Monday, October 31, 2011

Lynnderella Cauldron Drippings over OPI Chop-Sticking to my Story

 I'm a little late with today's post and I apologize for that. I had a bit of a long day, yet I didn't have a lot of things to do. =/ I know. It was just a hectic day for me and it's still going! I still have to get my son's things ready for school tomorrow and he has homework to do. So, this will be a short post but with many pictures! Woot!

This is two coats Chop-Sticking to my Story by OPI with no topcoat. 

One coat of Lynderella Cauldron Drippings over Chop-Sticking to my Story in the sun.

Closeup in the sun. This is like an orange version of The Glittering Crowd, and somehow it still manages to be unique.

This is in the shade.

 This is my second time wearing this combination and people seem to love it! I had plenty of compliments both times I wore it. Lynnderella just updated her blog shop stating she will be coming out with a new collection called Funny Money, but she will also be taking orders for all her previous collections. That's great news to me because I NEED another bottle of Connect the Dots, since it is my favorite polish of all time and I am so scared of running out. I have two bottles and 1/4 of another left, since I gave some of it away. Oh and I swapped one... that was a swap full of regret. Anywho, I'm glad I will be able to pick up another bottle or two. ^_^

Sunday, October 30, 2011

Image Beauty Deal on Plum District!! $20 for $40

 I wanted to do a really quick post to tell you about a deal going on Plum District right now. The deal is $20 for a $40 gift certificate good for anything on the website. Image Beauty is a really a great a e-tailer, in my experience, they have free shipping over $55 and they have discounted nail polish prices. China Glaze is 3.49 and Essie is 5.99. This is my referral code: https://www.plumdistrict.com/?ref=u6b2a6b30a8d.

Of course, you don't have to use it but if you do once you register I will get a $5 credit AND you will get $5 as well. In order to get the deal just click on Today's Plum Deals and it will be the first link. This is the direct link to it http://www.plumdistrict.com/moms/discount/everywhere/beauty-and-fashion-deals/image-beauty-20-for-over-30-000-brand-name-beauty-products-from-image-beauty-a-40-QvTqoS , if you don't want to use my link.

 Also, you can get this deal even cheaper by using code "spooky30" good until 10/31/11 for 30% off the deal which will come out to $14 saving yourself an extra $6!! There are 4 days left as of today, so if you choose you can also buy the deal later and you can use "fabulous" for a 10% discount which is good until 2/14/12. The discount won't show up until after you purchase the deal, so don't worry if it doesn't show the discount right away. Once, you purchase it the amount will update with the discount applied.

One last thing, they currently have the China Glaze Holiday Collection and Halloween Collection up!! Oh, and the Essie Winter Collection as well! This is the website for Image Beauty  http://www.discountbeautycenter.com/. Hope, this will save some of you some money!!

Friday, October 28, 2011

Zom-Body to Love w/ Black Shatter

 Halloween is just a few days away and that means that Halloween related manicures are coming to an end as well, on my blog at least. I planned on getting more posts in for this weekend, but I decided to just trim down my nails instead of repairing them again. I thought the breaks had grown out far enough, but it turns out they didn't and my two middle fingers aren't even now. So, instead I am settling on one last mani for Monday.

 Zom-body to Love is a bright green, glow in the dark polish that OPI came out with for Halloween this year. They released it in a duo with Black Shatter and as well sold it separately. The polish is so sheer that you will not be able to achieve full coverage without layering at least five to six coats. I wanted to get the same color in the bottle, so I decided to layer it over two coats of Sally Hansen White Out. BIG MISTAKE. This polish is also streaky! I did three layers of Zom-body to Love and stopped because I didn't want to have so many layers. I would recommend that you layer this over a green, that way the streaks won't show. Even with the streaks I wanted to wear this polish alone for at least one day because the color itself had me so entranced. It reminded me a lot of Nickolodeon's goo that they always had in one show or other when I was little.


I apologize for the tip wear in this picture. I didn't take pictures right away and the tip wear happened when I was heating up some tortillas. Little tip: Don't heat up tortillas with a fresh mani.

I was barely able to capture this polish in the dark with my camera, but in real life it GLOWS!


How cool does it look with Black Shatter? I swear Black Shatter is THE BEST thing to wear for Halloween. 

 It's a little sad that October is ending, but it's ok because I can't wait to be able to start listening to Christmas music without getting weird looks from my husband. ^_^

Thursday, October 27, 2011

A Halloween Dotticure

 I have no idea how I even started doing this mani. All I remember is that I got it into my head to see how many dots it would take to completely cover up a nail. As it turns out, it's really not that many. Well, at least the way I did it. I have a set of dotting tools with five different sizes, so I started making dots from the largest size and filled in any gaps at the end with the smaller size. I used Sally Hansen Xtreme Wear in Deep Purple, Black Out and Sun Kissed. Sally Hansen Xtreme Wear's are my absolute favorite polishes to use when doing nail art because they are very affordable AND have a great formula. 


 I did this on all ten fingers and it took less than 30 minutes and was super easy to do. I was iffy about the design, but my son changed my mind. It was the first thing he noticed when he saw me in the morning and told me they were "COOL". That made my day, since usually when I ask him if he likes my mani he'll say "yea" without even looking. ^_^


Wednesday, October 26, 2011

More apologies are in place for this design. It's a bit messy, but not just because it was a one a.m. design. I am experimenting with acrylic paint and it's a little tricky to get the correct amount of paint and the consistency is a lot smoother than polish. I also think that I need some better art brushes for acrylic paint because my nail art brushes don't seem to play well with the paint or it could be user error. O_o I used Sally Hansen Xtreme Wear in Deep Purple for the background, the grey is Wet Cement, the grass is Going Green and the moon is Mellow Yellow. Only the black is acrylic paint.


 This was my favorite design of the morning, but I was too lazy to do it to the other hand. This literally screams Halloween to me. I don't think I'll be doing it again though, because it is too time consuming and I have over half my stash as untrieds. Maybe next year! ^_^

Tuesday, October 25, 2011

Spooky Water Marbles!!

 Before we get started, I want to point out that all these water marbles were done around one or two a.m. Sunday morning. I didn't plan on doing any water marbles for Halloween, but what can I say? The "artistic" bug bit me, or it could be that I binged on Lindor Truffles and had tons of energy. Either way, my point is that these could have been ten times better. So, I apologize beforehand for all the bubbling and smearing, since I didn't let the polishes dry enough before applying topcoat.

 Ok, so now that we addressed the elephant in the room let's get started! This first one was inspired by pumpkins, hence all the pumpkin stickers. I initially only planned on doing one pumpkin on the index finger, but I got a little carried away. It's a little busy with all the dotting and stickers going on. Though the colors are spot on for Halloween. I used Sally Hansen Xtreme Wear in Sun Kissed and Black Out.

The problem with nail art stickers is that I cannot just place a sticker on my nail and call it a day. I always seem to need to add to it to finish the look. Whenever I just put the sticker on, it looks like it's missing something. That's why I added the dots on the above water marble and I added a second sticker here to balance it out. Skulls have never really been my thing, but they are slowly growing on me. Here I used Sally Hansen Xtreme Wear in Deep Purple, Sun Kissed and Black Out.

I had this idea to do a Frankenstein design ever since the month of October started, yet I could never think of anything else to put on the other fingers. Water marble was the perfect thing to do. I added purple to get a little color in there, since the green and black by themselves looked pretty blah. My index finger is not indicative of a bad cleanup job, rather it was done on purpose to imitate the squarish head of Frankenstein. Yup, the line could have been straighter. Oh, and I added those little bolts to the sides of my nails. I always wanted to have a reason to paint something other than my nail! The colors I used are Sally Hansen Xtreme Wear in Green with Envy, Deep Purple, Black Out and White On.

 I would have gone on doing water marbles all morning long, but then we had a thunderstorm coming through at the time and the light went out for a few minutes. I'm a total scared-y cat. I'm thinking that I want to do the Frankenstein water marble again for Thursday's pot luck, but then I'm also contemplating on using my Connect the Dots. I love that polish so much that I want to wear it all the time and I actually have to hide it from myself to keep me from wearing it 24/7! I have a few more designs I came up with before I did my water marbling, so stay tuned!  ^_^

Monday, October 24, 2011

China Glaze Zombie Zest

 This is the third polish in China Glaze's 2010 Halloween collection. Zombie Zest is a really beautiful green with hints of gold glitter polish and it's also relatively sheer. It took four coats to get it opaque, but you could do with three if you don't mind some visible nail line. I don't know that it reminds me of Zombies or Halloween, but it is a really great color for fall. To me it looks more like the color of leaves when they are ready to turn brown, but with glitter!


 I'm glad I was able to find the entire collection and even better, I only paid around $7 for all of them. It's really awesome when nail polish goes on sale, which is why I sometimes hate paying full price for some polishes. I know that later down the road the left over polishes will go on sale, but I also don't want to miss out and have to pay a lot more for a polish I missed out on. Anywho, I have some nail art lined up for this week, since I had a lot of spare time Sunday and was able to experiment. I don't promise pieces of art, but they are cute enough for Halloween. ^_^ 

Saturday, October 22, 2011

Sally Hansen Pumpkin Spice

 Here is the once elusive Pumpkin Spice. I remember when this polish came out and was so hard to find that it even went on eBay for an insane amount of money for just being a Sally Hansen Xtreme Wear. I have to admit that I did think about purchasing it, but I am glad I resisted as I later found this polish at multiple stores in the following weeks. This reminds me of China Glaze Mummy May I? because it almost has that same black jelly base, but with orange glitter instead of purple. The only problem with this polish is that it is best layered over another color as it is extremely sheer! This is five coats, but in Pumpkin Spice's defense the coats were really thin and it didn't end up giving me a thick look.


 I love how squishy it looks and I think this would be a great polish for Thanksgiving. Speaking of holidays, I am still debating on my Halloween mani. I want to do something Halloween-y, but I don't know what yet. I actually will have an opportunity to do two Halloween mani's, since we're having a Halloween potluck next Thursday where I work at. I can't wait because this is when I will also get to find out who is my Boo Buddy! We have been doing Boo Buddies all month long, it's kind of like Secret Santa, except it's for Halloween and every Friday we deliver a gift of $1- $2 and a big gift on the 31st. My Boo Buddy is totally awesome, he/she has given me really great gifts all month long and I am really excited to find out who it is! ^_^

Friday, October 21, 2011

Picture Tutorial: How to get two uses out of one box of Sally Hansen Salon Effects featuring Numbskull

 The only reason why I held off on buying Sally Hansen's Salon Effects was the price. You pay anywhere from 8-10 dollars for a box that will only serve for one use. Why buy one box of some strips when you can get a few drugstore polishes or one salon polish for that price? I actually don't think that I would have ever jumped the gun, had they not came out with the Halloween designs. The cute and unique designs were what drew me to making my first purchase. Even though I am now in love with them, it still stings a bit when I purchase a box because I know I will only get one wear out of them. Or so I thought. In order to get two manicures of one box it is necessary to have short nails as longer nails use up more of the strip and there will not be enough left for your next manicure. I know it sucks for those of you with long nails, but these are also a great pick me up when you have a break and have to file down your nails. Trust me. It happened to me and these strips put me back on the road to happiness after I had to file down my nails. I now plan to have a box or two for those days.


This is what comes in one box of Sally Hansen Salon Effects, plus another package of strips. I show only one because this is all you need for one manicure if you have short nails.


There are eight strips in each package of strips.

In order to get a complete manicure you will need to first choose the strips that best fit your nails and then cut those in half. I don't know about anyone else, but my thumb is pretty huge so I have to use a whole strip. 

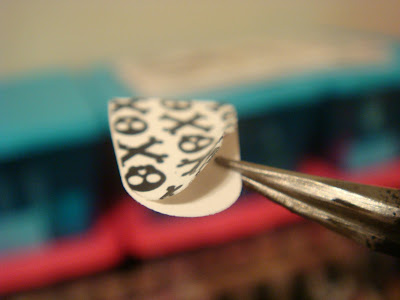
Because there is only one side on the strip where you can easily peel off the plastic, I would recommend some tweezers to pull the plastic off the half strips without the easy peel off.

Same thing when peeling off the actual strip from the paper backing. 

Here you see that there is still plenty of strip left over to cover the entire nail. 

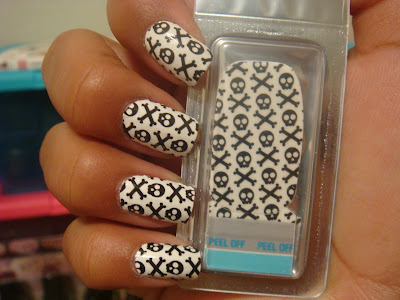
When you have a design like Numbskull you can use just one package of strips, but you will have one hand with the design facing outward and...

the other hand with the design facing inward.

 The fact that one hand had the design facing inward and the other hand with the design facing outward didn't bother me one bit. However, you can either alternate the way the design faces finger to finger for a more consistent look, and still use one package of strips. Otherwise, if you are totally OCD you will need to open both packages and use all the strips with the easy peel off side for one mani and the left over half strips for the next mani. This is really up to you and how you feel about it, but you will still get two uses out of each box either way. Lastly, in order to conserve your strips as fresh as possible, make sure you seal them in an air tight fashion so that they will keep pliable and usable. I put the left over strips back in the package they came in and then into a small plastic bag, like the one the file comes in, wrap them really tight with saran wrap and place them back into the plastic box. This is just my way of making the most of my Salon Effects, but if you have other ideas I'd be more than happy to hear them! ^_^

Thursday, October 20, 2011

China Glaze Mummy May I?

 Mummy May I is similar to Wet n' Wild's Purple Potion, but they are not the same. Mummy May I has lighter base and is much more jelly than Purple Potion. I used three coats to get it opaque and one coat of Seche Vite. I think I might like this one a tad better than Purple Potion, but just because you can clearly see the glitters in any lighting. Whereas, Purple Potion looks black in low lighting and only in bright lighting can you see the sparkly glitter.


 You can still find this polish at online websites like Image Beauty. They have the whole collection and all their China Glaze are only 3.49 plus free shipping on orders over $55, which is way too easy to do. I have ordered twice from them and they are so helpful. I placed my second order last Friday and I decided I wanted to add more polishes to my order, so I emailed them to see if that could be done. They responded to my email early Monday morning and were very quick with the whole process and sent me a new invoice within minutes. Kyle is the person who seems to always answer my emails, maybe everyone goes by Kyle? Lol. Anywho, they are a great website to order polish from, since they have many more brands than China Glaze and most of them are way below retail. ^_^

Wednesday, October 19, 2011

Getting abstract with ghosts!

 Another super easy nail art design! Like I said before, easy nail art is my favorite kind of nail art nowadays. I didn't want to spend too much time, so I decided to do an abstract dry water marbling. Dry water marbling is achieved by placing drops of nail polish onto your nail and creating lines or swirls with a dotting tool, toothpick, needle etc. In this instance, I wasn't going for any particular design, I just wanted to achieve an "abstract look". I did the dry water marbling on all my fingers except the index finger. I used a dotting tool to create the eyes and mouth of the ghost with Sally Hansen's Black Out and White On as the background.  The other fingers were done by using Sally Hansen Sunkissed, White On and Black Out as the background.


 This was the first time that I tried the dry water marbling technique and it was a lot cleaner than the wet water marbling. I have seen some really neat designs with dry water marbling, so maybe I'll give it another go. ^_^

Tuesday, October 18, 2011

China Glaze Ick-a-body

 It's Tuesday and we are already on the third week of October. Wow. Time goes by so fast that you blink and before you know it a whole year has gone by. It never ceases to amaze me at how quickly time passes because you could be having a bad day at work or just a bad day in general, and think the day can't come to an end soon enough. Then BAM! the whole day, month, year is over in an instant. Ok, maybe not quite that fast, but you get my drift. There are day days that I see my kids and realize just how much they have grown up and it saddens me because I know they will be all grown up one day and I won't be able to cuddle them anymore. *tear. Even now, my son looks around to see if anyone is looking before giving me a kiss when I drop him off at school. He's just in kindergarten! Geesh, kids nowadays!
Let me go ahead and stop myself there before I bore you to death with more "cute kid stories". I was really lucky when I was able to get the entire Awakening Collection for 1.99 a piece at Sally's earlier this year. I hadn't worn them as I was waiting for October to roll around and finally, I get to sport them all month long! Ick-a-body was a bit sheer, but it only took three coats for full coverage as opposed to it's dupe, Sally Hansen's Pumpkin Spice, which took five!


Sally Hansen's Pumpkin Spice is not a dead on dupe to this polish, but it is close enough that you might not need both. I am hanging on to both for now because to me they are different enough to warrant keeping both in my stash. ^_^

Monday, October 17, 2011

Wet n' Wild R.I.P Black Magic

 The last tombstone polish I have is Black Magic. This is a black based polish with micro rusty-orange and silver microglitter. I love the fact that the glitters in this polish are very visible, despite it being in a black base. It doesn't dry gritty or bumpy either and I just need one coat of Seche Vite to get it smooth. I did use three coats because I had some bald spots with two. I only had two problems with this polish. One was the brush, it had stray hairs all over the place which I had to cut to be able to have an even brush. The other was the formula. It was pretty thick even though I added a few drops of thinner, so it did take a bit to get even coverage. Still, the end result was fab and the rusty-orange glitter in this polish really gives it that Halloween look.


 These polishes are a great bargain for 1.99, issues and all. I only wish they had a greater selection of colors because the tombstone packaging is so adorable! ^_^

Friday, October 14, 2011

Lynnderella All Hallow's Eve over Here Today... Aragon Tomorrow

 I was really excited when Lynnderella put up her Halloween collection up for sale and yet, I have only worn one of the polishes so far. They are all so beautiful, but there is so much polish and so little time. All Hallow's Eve actually arrived broken and it was really sad to see such a wonderful creation in pieces, but the lovely Lynn was great about quickly getting me out a replacement bottle. She didn't even charge me for shipping!

 The polish itself is a medley of various glitters. There are at least four different colored glitters and an array of shapes and sizes. I think that the reason why I am so in love with her glitters is because mostly all her glitters include square or bar glitter, which I love. You can build up the opacity on the majority of here polishes, however I prefer to layer them. It makes the surface a lot smoother and I get to save some polish. For this manicure I used three coats of Here Today... Aragon Tomorrow and two coats of All Hallow's Eve.

Here are pictures of Here Today... Aragon Tomorrow

I had to include this picture, but it's not color accurate. It's just so glossy!


This the final look after two coats of All Hallow's Eve.


 As Wheezie, from Dragon Tales would say, "Looooove it!" I'm anxious to try some more manicures with my Lynnderella's. Although, it's a little sad, since I had to nubbinize my nails. I am such a doofus that I broke two more nails! I think that's two breaks too many, so I am currently rocking some nubs. ^_^

Thursday, October 13, 2011

Sally Hansen Salon Effects in Ghoulie Girl

 In my post for Spun for You I mentioned that I wasn't completely sold on the Salon Effects, even though I had a positive experience with those strips. The reason I wasn't completely on board was because of the strips I am about to show you today. This design was the second design I was most excited for during the promo pictures and was happy when I was able to pick these up along with the spiderweb strips. Sadly, I wasn't at all thrilled with them.

 I love how the design looks in pictures and I did receive several compliments, but to me they weren't a home run. I am not knocking on the design or the strips because I think that I might have been partly to blame on that. When I applied the Spun for You strips I had a few minuscule gaps on the sides of my nails with certain fingers, so I decided that this time around I would just use a bigger size to get, what I thought, a better fit. Well, that might not have been the best idea. I found that working with a strip that was slightly bigger than your nail was a lot more difficult to handle than a strip slightly smaller than your nail. I had problems smoothing downthe strip all around the edges of my nails, since the bigger strips were excessive and kept wanting to bunch up. In order to correct this I had to do a lot of stretching, which then affected the design. It wasn't too noticeable, but it didn't make me a happy camper. Plus, I had to do cleanup to remove the excess portions of the strips.

  The overall time it takes to put on the Salon Effects for me has been five to ten minutes from start to finish. I love that. There is no cleanup involved, if done correctly, and you get a great looking design once you're done and the removal process is extremely fast. I have heard of people complaining about the sticky residue that is left on the nail after removal, but I have not had that issue.

 One thing I do want to warn you about, is that you definitely do need a topcoat to prevent chipping on these strips. When I wore Spun for You, I was impressed at the wear of the strips. I used my nails for everything and at the end of five days I ended up taking them off. Not because they were chipped, but because I was ready for a new manicure. They did show a bit of wear on the sides of the tip of my nails, but I think that was because of how I used my nails and the fact that they were quite long. The reason I mention all this is because I thought that I would try to give the strips a go without any topcoat and this is what ended up happening in less than 30 minutes:

My middle finger chipped and some of the strips on the other nails were beginning to lift. I am super grateful to Sally Hansen for including more than just ten strips in the box, which, by the way this box had no missing strips. I wasn't going to walk around with a freshly done manicure and a huge chip on it, so I just used one of the extra strips to replace the chipped one.

Here they are all nicely finished and topcoated with Seche Vite.

 Going along with my top coat warning, I want to add that using Seche Vite alone will cause the lifting I had in my Spun for You manicure and as well cause shrinkage at the cuticle. You can easily fix the lifting by pooling a bit of acetone at the cuticle once Seche Vite has dried and then lightly pat the strip down once most of the acetone has evaporated. You have to wait for the acetone to evaporate to prevent smudging on the design. I didn't notice the shrinkage on the Spun for You design because I placed the strips a bit too close to the cuticle, so when the shrinkage happened it looked perfect. If you want to prevent shrinkage you can use a topcoat under Seche Vite to protect direct contact with the strips. Also, using Sally Hansen's Inst- Dri in the red bottle will not protect the strips. I used this on my left hand and also had some minor chipping before I topcoated it with Seche Vite. I hope to be able to post a picture tutorial on how to apply salon effect strips by next week, with another design, and I will include more tips as well as how to get two uses out of one box of salon effects. ^_^

Wednesday, October 12, 2011

Wet n' Wild R.I.P Creepy Pumpkin

 Creepy Pumpkin is a polish I picked up at Ulta for 1.99 during the BOGO free Butter London sale. Sometimes I have to put money aside for these things, so that I won't have to give any explanations later on. Yup, I'm talking about my husband. No need to worry him about these frivolous things. So, I had about 40.00 set aside just for the Butter London polishes and luckily for me there were only four that caught my attention. Which meant that I had a few extra bucks to spend and it was a great coincidence because I just so happened to spot these Wet n' Wild R.I.P. polishes!

 The brush on this one wasn't as crappy as the one from the Purple Potion one, which was good because I'm getting tired of having to nip stray bristles. This was a pretty sheer polish, but it wasn't too thick so I was able to get away with four semi-thin coats to get it opaque. I don't like it when my visible nail line shows too much, otherwise three coats would have been good.


 Orange polishes are definitely not a color that I purchase often, but October really gets me in the mood for orange and black! Plus, my son's school colors are orange and black, so it doesn't hurt to represent every once in awhile. ^_^