Sunday, July 31, 2011

Kickoff to Lynnderella's Week with Mercurial

 I am super excited to be doing Lynnderella Week and since I have seven of her polishes to show you, I am having to start on Sunday. I have to say that my favorite type of nail polishes are the ones with glitter. I absolutely adore them and cannot get enough of them. That being said, there is no mystery as to why I am in love with Lynderella's Creations.  Each one of her polishes is as unique as the next and they truly have no equal.

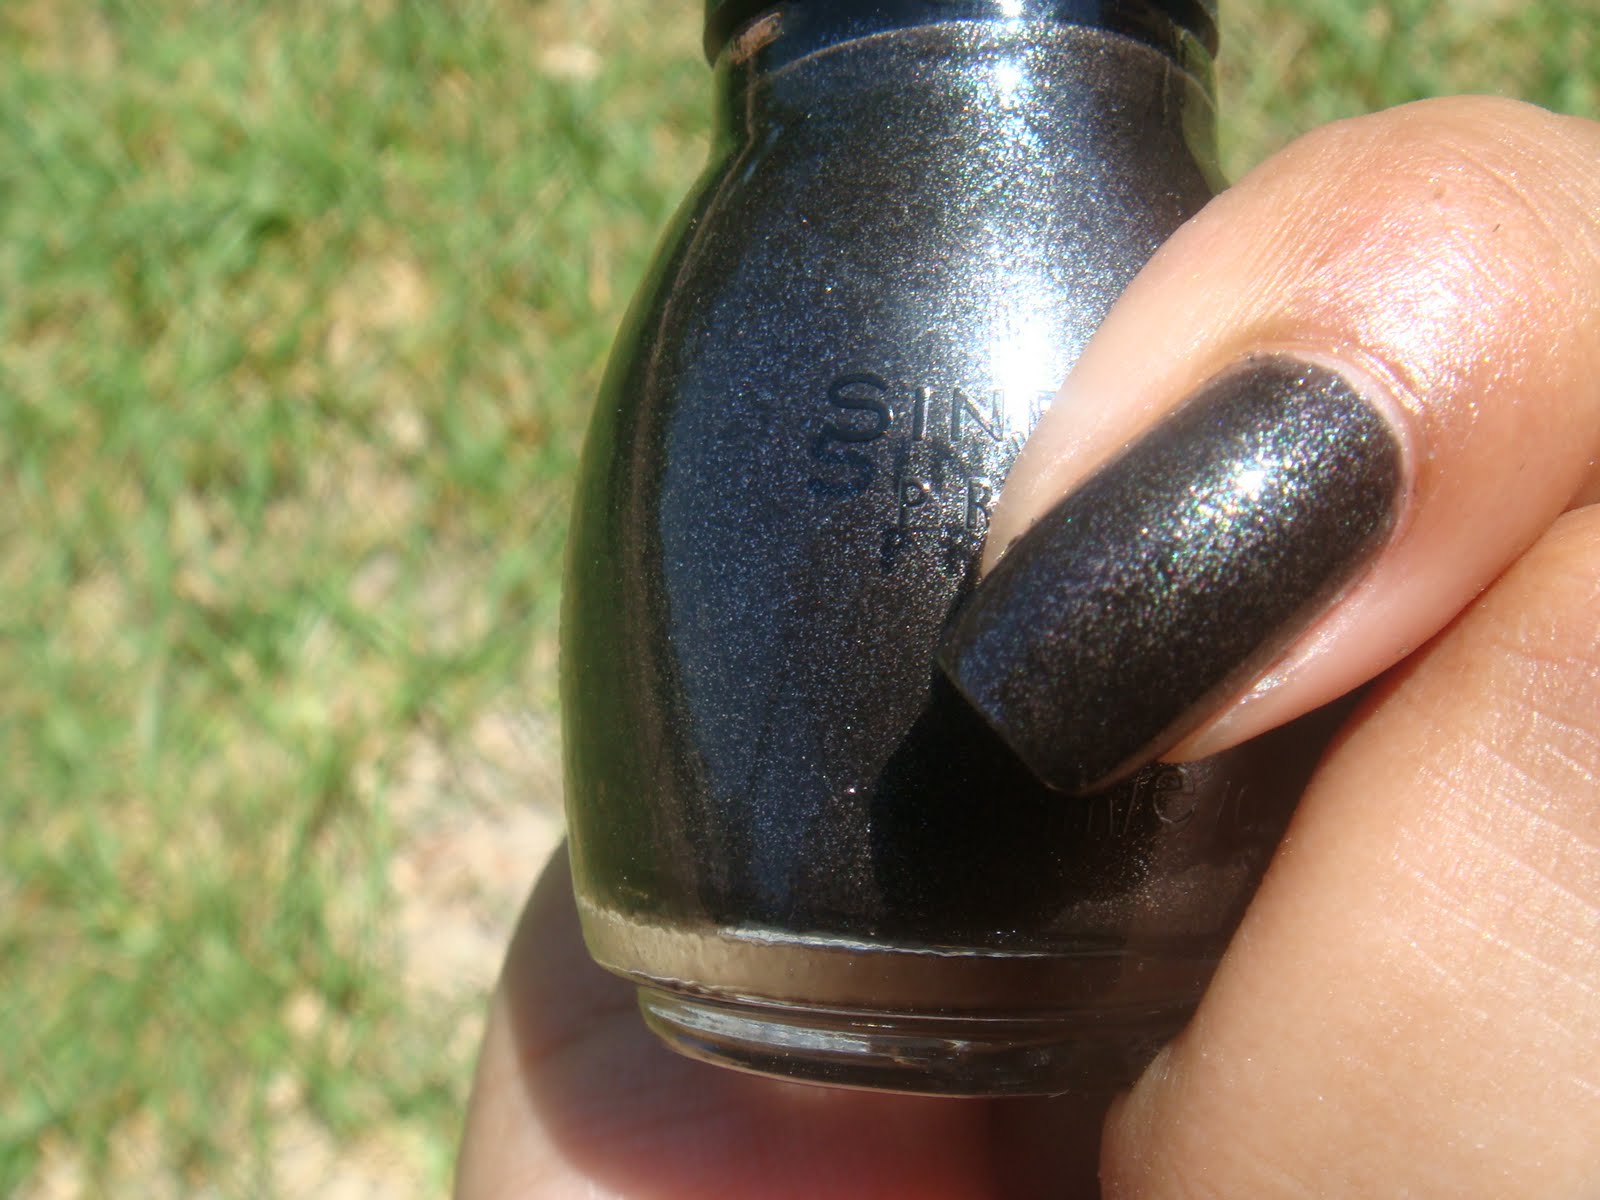
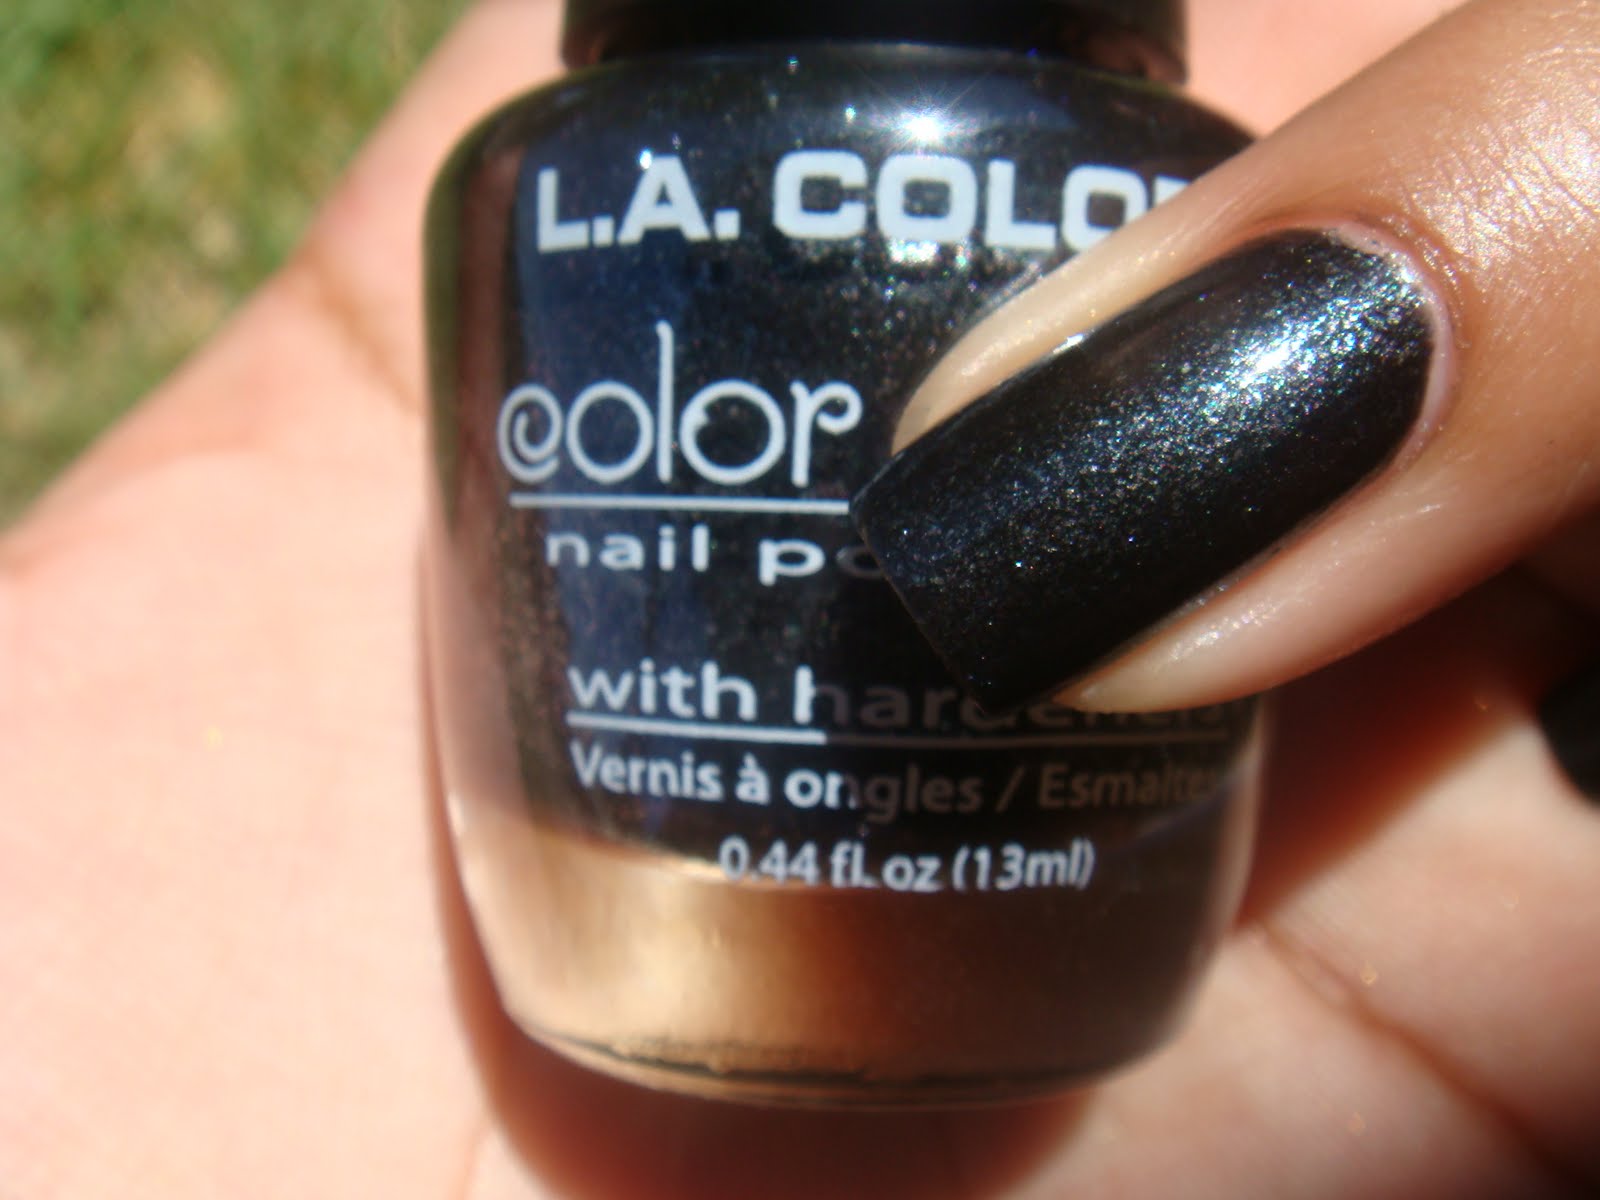
 To kickoff Lynnderella's Week, I have decided to spotlight on Mercurial. Above, I swatched this polish on an index card because I feel that the details of this polish is best seen this way. As you can see, there are many different shapes and sizes glitter. There are small, medium and large silver hexagons, small lilac hexagons, and small silver squares all mixed in a silver microglitter base with a hint of gray. This polish is almost jellyish except that it doesn't transfer like that on the nail. There's just enough amount of gray tint in this polish to create full coverage with two to three coats, depending on application. When I first wore this polish, I did three coats, but in my opinion the best way to wear this polish is with a black base. There is so much glitter in this polish, that if you attempt to use it alone, you will end up with a thick manicure.


This is semi-shade. There is one lonely large hex glitter on my middle finger. The polish doesn't have too many large hex glitters, but I think it works best that way. Too much large glitters would only take away from the effect of this polish.

Sun picture.

Closeup.

 Before I knew about the danger of mercury, I used to break thermometers and dump the mercury in a plastic bottle cap and just pick at it with a toothpick. I was so amazed by it and loved seeing it separate. This polish has that same consistency. Some people might find this a little thick, but I enjoyed applying it because it took me back to my mercury loving days. I don't know why this is named Mercurial because other than the consistency, the polish itself reminds me more of outer space. It just has that "out of this world" look and looking at it makes me want to watch Nova! (Nova is show about everything space related and it airs on KERA.)

*Currently Lynnderella has post-poned her fall collection indefinitely, and her shop is closed at the moment. However, you can follow here here to make sure you don't miss the update when she reopens her shop.

Friday, July 29, 2011

Sally Hansen Water Marble Week: Blue Me Away!

 The grand finale of Sally Hansen Water Marble Week has now come to an end. *tear Even though this week's water marble theme has come to it's end, I still have so many other color themes I would like to do. There's purple, green, black and white, and so many other great color combinations, so I know I will end up doing this theme again in the future. For today, however, I will settle on showing you my blue themed water marble. I used White On, Blue Me Away! and Blue It with White On as a base.

 I haven't mentioned my nail polish usage in any of my posts, but I actually use A LOT of nail polish. I use about 10 drops of nail polish to be able to incorporate all the colors on one nail. It also allows room for error because if you mess up on one side, you can just  move to the opposite side and start over.

 This water marble didn't quite turn out how I wanted, but I was happy with the end result. Initially, I attempted to get the marbling to go in the same direction for all the nails, but I fudged up on two nails. You can see that the pinky and index have the "half flowers" going the opposite way from the rest of the nails. Although, this wasn't what I wanted, I was actually happy because instead of the "half flowers" I was going for, I was able to get "waves"! Or at least that's what it reminds me of. It's so bright and blue, that it makes me want to go swimming!

 Sun picture.

A closeup in the sun. 

Shade picture. 

 I don't know who invented water marbling, but props to them. This is a great way to achieve nail art without being an artist, which is always welcome in my book! I'm not great at freehand, so this technique is something that I am grateful for.

 Next week, I have decided to do a Lynderella week because, honestly, her polishes deserve a whole week of their own... aaand I'm dying to wear Connect the Dots again! Ok, so my decision might have something to do with my craving for Connect the Dots, but there are other great creations of hers that I would like to share. *psst there may or may not be a silver holo involved as well.

Thursday, July 28, 2011

Sally Hansen Water Marble Week: Disco Ball

 I envinsioned today's manicure going a lot smoother, sadly that wasn't the case. I always start with my left hand and I had another fail! Once I got started on my right hand, I started getting carried away with creating lines and well, the final look ended up being more squiggly than half flowers. I wasn't satisfied at all with this, so I decided to add a layer of Disco Ball and it actually helped brighten up my mani.

 I used Wet Cement, Mint Sorbet and Lacey Lilac over a white base. I tried to darken the colors by adding double drops of each polish, but that ended up in a huge disaster! I did the double drop with the teal mani and I think that worked out well, since it was only one color being darkened. It was way too much polish, though for this water marble and everything kind of just merged into one big glop of polish. I had to settle for a pastel look, which I like, but I just wish it had been a tad darker.

 Shade picture.

Sun picture. 

Here's a picture of my pre-cleanup on my left hand. I think my biggest issue with clean up is that I tend to get it all the way down my fingers. This problem could be easily fixed, if I would just tape further down, but no I refuse to think I'm messy everytime I start a water marble. 

  My final water marble for the week will be blue themed, and I really hope that it turns out better than this one. I will also tape further down this time, to avoid the mess on my fingers. So yea, in conclusion, cleanup can be a B if you let it, but with proper taping it can be avoided. Lol I haven't used "in conclusion" in years... just felt like using it. ^_^


Wednesday, July 27, 2011

Sally Hansen Water Marble Week: Sunkissed

 The third water marble for this week turned out to be the best one I have ever done. I used Green with Envy, Mellow Yellow and Sunkissed with a white base. I think I'm getting the hang of it, but I'm still far from being good at it. The most difficult part to me is getting the design to be as closely as possible for each nail. Although, the whole point, to me, of water marble is to get random designs, I like consistency. So, I might starting taking pictures of the polish in the water before I dip my nail to use as a guide for the rest of the nails.

Shade picture. I really loved how my index finger came out. I wish I knew how I did this lol.

Sun picture. Here you can really see the green polish. It's such a pretty color.

I decided to add some oomph to this mani with Sally Hansen Hidden Treasure. Click on the picture to see the flakes!

 I was so happy with this water marble! I only wished I was able to rock it for more than a day. Now that I have started blogging, it seems like my manicures are only on my hands for a day and sometimes just hours. Still, I love it and I'm sure I'll have tons of time later to redo some of my favorite ones... Right??

Tuesday, July 26, 2011

Sally Hansen Water Marble Week: The Real Teal

 Today's post features Xtreme Wears in Black Out, Celeb City and The Real Teal. I have never done a base color other than white, but this color scheme makes me want to try it. Since I used white I had to use two drops of black each time I dropped polish in, and I should have used two of the silver as well. The only thing is I'm not sure how well the teal will show up if I used, say a black base.

 In the shade.

In the sun. My index finger's nail isn't bent like it seems, it's just that I didn't think I had enough silver so I tried to go in with the polish's brush and add some more sparkle. I wish I hadn't though, because while it did look shiny, it made the look messy.

Fail. This was the first hand I tried doing and well, I'll let the picture speak for itself.

 I also fudged up by using a top coat other than Seche Vite on this. Other top coats smear the colors into each other if they aren't quite dry, but Seche Vite is great for nail art because it gives you quick dry time without the muss. 

Monday, July 25, 2011

Sally Hansen Water Marble Week: Bubblegum Goodness


 This week I will finally be able to do my water marble themed week! For those of you who are not familiar with water marbling, I'll give you a brief description. Water marbling consists of dropping nail polish into a container filled with water. Once, that is done, you then draw a design and then dip your finger to get the design onto your nail. If you would like more information on this and to see a true artist at work, I suggest going over to Simple Little Pleasure's YouTube channel. She has really great videos that explain everything from how to get started, to how to make many different designs with the water marbling technique.

 The thing I hate most about water marbling, is that there is tons of nail polish being wasted. This is where Sally Hansen comes in. Sally Hansen has a line called Xtreme Wears that are super affordable, have a great formula, AND have a huge selection of colors. Aside from all those great things about this polish, I have to say that they are great for water marbling because they don't dry as fast as others and they are really well pigmented.

 I am not great at water marbling so the design for all week will be the same. The only thing that will vary will be the color scheme. Even though the design will be the same, which is what I call a half flower, they will actually be different because no two nails will ever be the same when water mabling. For this scheme, I used two coats of Sally Hansen Lavender Cloud and I alternated drops of polish between Bubblegum Pink, Fuschia Power and Lavender Cloud. (Lavender Cloud was actually on sale for 2.19 when I bought it!)

In the sun.

Shade.

A closeup. I still haven't been able to figure out how to avoid bubbling, which you can see big time on the index finger. Still, I was pleased with the final outcome.

 Even though water marbling is a PITA when it comes to cleanup, the effect is totally awesome!

Thursday, July 21, 2011

A much better comparison of SH Ice Queen and NYC Starry Silver Glitter

 I have noticed that I get a lot of hits on my comparison of Ice Queen and Starry Silver Glitter, and I'm sorry that the whole post in general isn't that great. I know I hate it when I search a comparison and it really doesn't help me out, so I have decided to redo the comparison with better pictures and side by side comparisons. Since, I was already swatching my Essie's, I thought it would be nice to show these glitters on them.


 Both Ice Queen and Starry Silver Glitter have pink and light blue hexagonal glitters mixed with smaller silver glitter suspended in a clear base. Ice Queen's smaller silver glitter leans a little bit towards being holographic, but it doesn't quite get there. Starry Silver Glitter, however, is holographic. They both had smooth application, but Ice Queen seems to have a lot less glitter, meanwhile Starry Silver Glitter is packed with it. This is why Ice Queen's coverage with one coat is very sparse. To be consistent with the comparison, I only dipped the brush once into the polish for each coat.


For French Affair, I started off with one coat of each glitter. I have Ice Queen on the pinky and middle fingers and Starry Silver Glitter on my index and pointer.

This is two coats of Ice Queen on the pinky and three coats on the middle finger. Even with three coats of Ice Queen, I still can't get a full look with it like I can with Starry Silver Glitter. I only used two coats of Starry Silver Glitter on the index and pointer, and that's all you really need.

With Nice is Nice I started with one coat of both Ice Queen and Starry Silver Glitter. The pinky and middle  fingers have Ice Queen and the index and pointer have Starry Silver Glitter.

Pinky and middle finger have two coats of Ice Queen and index and pointer have two coats of Starry Silver Glitter.

I also did one coat of Ice Queen on the pinky and middle fingers and one coat of Starry Silver Glitter over Coat Azure.

For the last pic I did three coats of Ice Queen on the pinky and middle finger and two coats of Starry Silver Glitter on the index and pointer. Normally, I wouldn't use so much glitter as there is on the index finger, but for comparison's sake I had to use the whole second coat.

 Bottom line, if you are interested in this polish, definitely go for NYC Starry Silver Glitter. It's less than a dollar and you can find it at any drugstore or superstore. Ice Queen retails for 1.99 and is available at most drugstores, but I have yet to spot it at any superstore.

Wednesday, July 20, 2011

My First Essie's: French Affair, Nice is Nice, and Coat Azure

 Essie is a brand that has never really caught my attention because I tend to gravitate to colors that are brighter and bolder when shopping for nail polish. Lately, I've actually been buying lighter shades and when I found this collection on sale, I couldn't resist. The only thing that kind of bothered me, was that the brush is tiny! It took me a few nails to get used to it, but it's actually not that bad.

 This is French Affair in the shade. I used three coats, but if you have short nails, you can get away with two.

French Affair in the sun. I absolutely loved how this color looked on my skintone and I am looking forward to buying more pinks like this one.

Nice is Nice is a beautiful lilac, I used three coats for this one as well.

Nice is Nice in the sun.

... and my favorite of all... Coat Azure. Even though I liked the other two colors, I still can't help but love brighter colors. However, this one isn't a bright blue at all, it's more of a shimmery, dusty blue.  Two coats on this color would have been perfect, but for consistency, I went ahead and did three.

You can see the shimmer in Coat Azure much better in the sun.

 Overall, now that I own Essie polishes I wish I hadn't overlooked them because they really are great quality nail polishes. I just wish they would broaden their color scheme, but I'm sure I'm not the only one who thinks that.

Tuesday, July 19, 2011

Sally Hansen Cherry Smash over China Glaze Cheers to You - Mattified!

 I have always been tempted to pick up the Sally Hansen Crackle Overcoats, but the price always puts me off. I feel that they are overpriced and since I'm sill on the fence on crackle/shatter/fractured/textured polishes, I could never justify the purchase. So, when my husband surprised me with this one, I was super excited to try it out. I do own the Red Shatter by OPI and that one is actually a lot darker, and opaque than Cherry Smash. Cherry Smash is a bright blood red that is quite see through compared to other crackles, but since I don't own any of the other colors by SH, I can't be for sure that all of them are like this.

I used two coats of China Glaze Cheers to You and one coat of Cherry Smash.

This is a sun picture taken while the sun was setting, so the color looks more orange in the picture. In real life, it's actually a bright red.

Shade picture with Hard Candy's matte top coat.

Sun picture with matte top coat.

 I was able to get larger cracking because I used a thicker coat than normal and I also tried applying it in sections on the index finger, rather than long swipes. This created more horizontal cracks, instead of just vertical cracks. I'm still experimenting with my matte top coat, but so far I'm loving the results!

Monday, July 18, 2011

Lynnderella Dressed in Yell-Oh!

Lynnderella's Connect the Dots has quickly become my favorite polish.. ever! In the bottle, it doesn't look like anything too special, but have you ever seen anything like this? The polish consists of so many different types of glitter! The two colors in the mix are black and white and include a varitey of shapes. There is square, bar, and hexagonal glitter of different sizes mixed in a clear base with micro sized glitter. That is a lot going on, but it works so well.


I wanted to layer this over everything, and I still do... However, for this post I decided to go with one of my untrieds, Cosmetic Arts Yell- Oh!. I have several yellows in my stash, but I have never worn yellow as a full mani. I have to say this particular yellow was very loud, but I did enjoy wearing it.

I used three coats of Yell-Oh! and one coat of Connect the Dots.


 A close up of this awesome polish.

 Lynnderella is not a brand you can find at your local brick and mortar store. This polish is actually a creation made by a nail polish fanatic who goes by "Lynnderella". I do have to tell you that the polish was a little pricey, but it was so worth it. I'm even hoping to be able to get backups as I will be using this polish a lot in the future. If you want to try and get ahold of this polish or to see what other frankens Lynnderella has, you can click here. As of now, she is still out of stock, but she did say that she will have another sale soon.

Thursday, July 14, 2011

Chanel Peridot w/ Graphite accent & Graphite w/ Peridot accent

 I know you've seen these polishes a million times already, but have you seen them together? This was a mani that surged out of sheer excitement. I was so excited when I received these two polishes in the mail that I was indecisive about which one to wear first, so I wore them both!! These are my first two Chanel nail polishes, so please excuse my lack of knowledge. Before I received these polishes I was worried about application because of the huge handle the brush had, or so I thought.  

However, when I first attempted to open one of these nail polishes, the top came off! I must admit that my heart sank a little because I thought I had wrecked one of my first ever, Chanel nail polishes. I was quickly reassured that this wasn't the case, as the top of the smaller cap had Chanel's logo as well. So, then I was ooh-ing and ah-ing over the genial design Chanel had come up with for these bottles. 

The application was awesome. They both applied flawlessly. I used three coats on all fingers topped with Diamond Dry topcoat. This is a sun picture.

This is a weirdish angle, but I was trying to capture the green duochromeness in Peridot. This is a shade picture.

Another shade picture. This was my favorite picture because it shows the different shades in Peridot.

Here is Graphite with a Peridot accent. I have heard people compare this to other colors such as OPI Lucertainly Look Marvelous, but in my opion this beautiful color has no dupe. 

Here's a sun picture, but it doesn't depict the true color of Graphite. It does however, show how sparkly it is! The picture above is a lot closer to the color in real life, which is a goldish silverish foily kind of color.

 I totally loved my first experience with my first Chanel nail polishes. The only thing that is that I somehow felt like I should go around telling people I was wearing Chanel nail polish. It's a little silly lol, but I just wanted be able to tell everyone how awesome these polishes were. At least, here in my blog I get to do that. ^_^

Wednesday, July 13, 2011

Black Shimmer Nail Polishes - Swatches/ Comparisons

 Today I have a swatch/ comparison for you. Somehow, (I have no idea how O_O) I have accumulated four black polishes with microglitter in the mix. When I was doing my nail polish inventory, a few weeks ago, I noticed that they were almost identical. The only thing was that I was doing my inventory in low lighting, so I couldn't be certain.

 This weekend I finally decided to swatch them to see how different and/ or alike they were. I did two coats of each nail polish and I only took sun pictures because the lighting in the shade didn't show any of the glitter.


This is Sinful Colors Secret Admirer. If you're looking for a black polish with noticeable silver glitter, then this is the polish for you. This was the only one that you could really tell there was glitter in there and it almost gives it a duochrome look.

This is Little Black Dress. The L.A. Colors one and this one were the only two that came close to what I envisioned black with microglitter polish to be. They are both black bases and both have microglitter, but it's less pronounced and gives it a more subtle look than Secret Admirer.

Here is L.A. Colors. Unfortunately, it didn't have a name. I bought this one in a set of six other polishes. The packaging said it was the Shimmer Brights Collection, yet I couldn't find any names for them online. This one and Little Black Dress are pretty close dupes.

The last one is Essence Fabuless. This polish is definitely way more subdued than all of them. It's basically a black creme with a sparse sprinkling of microglitter

 I'm sorry that I didn't provide full swatches of these, but my original plan was to take a closeup of them all together, so that you could distinguish the difference better. However, that was a total fail. When I took pictures like that, you could barely even tell them apart, except for Secret Admirer.