I love how the design looks in pictures and I did receive several compliments, but to me they weren't a home run. I am not knocking on the design or the strips because I think that I might have been partly to blame on that. When I applied the Spun for You strips I had a few minuscule gaps on the sides of my nails with certain fingers, so I decided that this time around I would just use a bigger size to get, what I thought, a better fit. Well, that might not have been the best idea. I found that working with a strip that was slightly bigger than your nail was a lot more difficult to handle than a strip slightly smaller than your nail. I had problems smoothing downthe strip all around the edges of my nails, since the bigger strips were excessive and kept wanting to bunch up. In order to correct this I had to do a lot of stretching, which then affected the design. It wasn't too noticeable, but it didn't make me a happy camper. Plus, I had to do cleanup to remove the excess portions of the strips.
The overall time it takes to put on the Salon Effects for me has been five to ten minutes from start to finish. I love that. There is no cleanup involved, if done correctly, and you get a great looking design once you're done and the removal process is extremely fast. I have heard of people complaining about the sticky residue that is left on the nail after removal, but I have not had that issue.
One thing I do want to warn you about, is that you definitely do need a topcoat to prevent chipping on these strips. When I wore Spun for You, I was impressed at the wear of the strips. I used my nails for everything and at the end of five days I ended up taking them off. Not because they were chipped, but because I was ready for a new manicure. They did show a bit of wear on the sides of the tip of my nails, but I think that was because of how I used my nails and the fact that they were quite long. The reason I mention all this is because I thought that I would try to give the strips a go without any topcoat and this is what ended up happening in less than 30 minutes:
My middle finger chipped and some of the strips on the other nails were beginning to lift. I am super grateful to Sally Hansen for including more than just ten strips in the box, which, by the way this box had no missing strips. I wasn't going to walk around with a freshly done manicure and a huge chip on it, so I just used one of the extra strips to replace the chipped one.

Here they are all nicely finished and topcoated with Seche Vite.

Going along with my top coat warning, I want to add that using Seche Vite alone will cause the lifting I had in my Spun for You manicure and as well cause shrinkage at the cuticle. You can easily fix the lifting by pooling a bit of acetone at the cuticle once Seche Vite has dried and then lightly pat the strip down once most of the acetone has evaporated. You have to wait for the acetone to evaporate to prevent smudging on the design. I didn't notice the shrinkage on the Spun for You design because I placed the strips a bit too close to the cuticle, so when the shrinkage happened it looked perfect. If you want to prevent shrinkage you can use a topcoat under Seche Vite to protect direct contact with the strips. Also, using Sally Hansen's Inst- Dri in the red bottle will not protect the strips. I used this on my left hand and also had some minor chipping before I topcoated it with Seche Vite. I hope to be able to post a picture tutorial on how to apply salon effect strips by next week, with another design, and I will include more tips as well as how to get two uses out of one box of salon effects. ^_^
Great tips. I think they are very important to know if anyone is to use these.
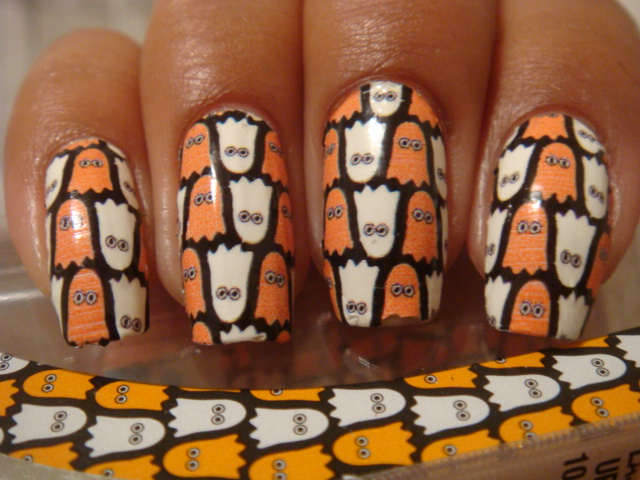
ReplyDeleteGahh I can't get over how cute this one is! I recently saw this over at DizzyNails too (:
ReplyDelete@Kimberly I hope they're of use to someone!
ReplyDelete@Eileen It is super cute, but I didn't like it on my long nails. I went over to DizzyNails and it looks so much better on nubs.