Showing posts with label Sinful Colors. Show all posts

Friday, September 23, 2011

The Lacquer Room's First Ever Giveaway Featuring Lynnderella Snow Angel!

 Ok guys so here it is, my blog's first giveaway. I had delayed on posting the giveaway because I was unsure as to how I wanted pick a winner and I didn't want to make it too complicated, so I scrapped the form! I am going to make this super duper easy for everyone, therefore I will not be asking you to tweet, blog, or fill out a form to be able to win these prizes. I will only have one winner. Before we get on to the requirements, let's have a look at what you can win!


The star of the show here is Lynnderella's Snow Angel.

Orly Bonder and a Wet n' Wild Fast Dry topcoat.

An e.l.f cuticle pen and a the holy grail brush that most nail polish lover's use for cleaning up around your cuticles, including myself, an e.l.f concealer brush.

Saly Hansen Xtreme Wear in Pumpkin Spice, Rimmel in Grey Matter and another Sally Hansen Xtreme Wear in Hot Magenta.

Finally, OPI's Black Shatter and Sinful Color in Green Ocean.


 All these products are brand new, never tested, opened or swatched and purchased by me with the exception of Snow Angel. Snow Angel was given to me by Lynnderella so that I could do a giveaway on my blog. Seriously guys, she is the sweetest person ever. Here is a link to her blog where she does her sales http://lynnderella-lynnderella.blogspot.com/. Her glitters are incredible so if you have the chance to buy some of her creations, definitely don't miss out!!

 If you have made it this far down on the post then I am assuming that you really are interested in entering this here giveaway, so without further adieu, here are the requirements:
  •  Be a follower on my blog of course! Although, I hope if you do follow me it's because you like my blog and look forward to my future posts and not just because of this giveaway! No? Yes? Maybe? Well, whatever your reason may be for initially following my blog, I hope you'll stick around!
  • Last but not least, comment on this post telling me why you would like to win. I know you're saying "What? Only two requirements??" Yup! Only two! There is no need for any extra hooplah to enter, unless of course, you WANT to let other people know about my blog. If that's the case, then I'd be very much grateful.
 So, if you only have to comment then how will you know you won?? Hmm.... iiiiinteresting question! I will do a post specifically for this reason. It will have the winner's name, that is your username since I will be using the name that appears on the comment, on the title of the post. Something like "Congratulations Blank!" I will use random.org to pick a winner. If this is your userid then simply email me letting me know you want to claim your prize at hklinda1976@gmail.com within 48 hours after the post has been posted, otherwise I will chose another comment with random.org. I will then get all necessary information to ship the item to you. The contest will end 10/07/2011 at 12:00am Central Time, so if you're comment reaches my email after this time then you will not be entered into the contest.

 ONE MORE THING! This is totally optional if you win, but I would like to do a followup with the winner. Something along the lines of doing a guest post on my blog. You don't have to agree to this if you win, only if you want to, but I think it would be neat to see the winner showcased with maybe a NOTD or even random cat/dog/kid or whatever kind of pictures the winner wants to have posted. It'd be even more awesome if we could get a NOTD with one of the prizes!! Ok, that's all I have for you guys! Good luck to all who enter the giveaway!

Sunday, September 11, 2011

Drinking my blues away!

 Before we get on to some blue spam, I would just like to apologize for my lack of posting these past few weeks. Now that I have a blog, I seriously have no idea how so many other bloggers can post daily. It is such hard work and kudos to them (or you if you're a blogger) for always being there for us nail fanatics!

Also, I am in the midst of working to do a giveaway, but I'm really clueless as to how to even begin so please bear with me. I don't have all the details as of yet and really the only reason for this giveaway is because Lynnderella was kind of enough to send me a Snow Angel to give away on my blog back when she did her first sale. I didn't do the giveaway right away since I wanted to be able to add a little more to the prizes. Now, that I have accumulated a few things, it really is just a matter of me getting informed on how best to do the giveaway. So just hold tight and I will post deets as soon as possible!

 Enough chit chat and on to the pretties!!!

First up is Sinful Colors Paradise, this is such a pretty color for spring.

Zoya Crystal. This polish took foreeeeever to dry!!

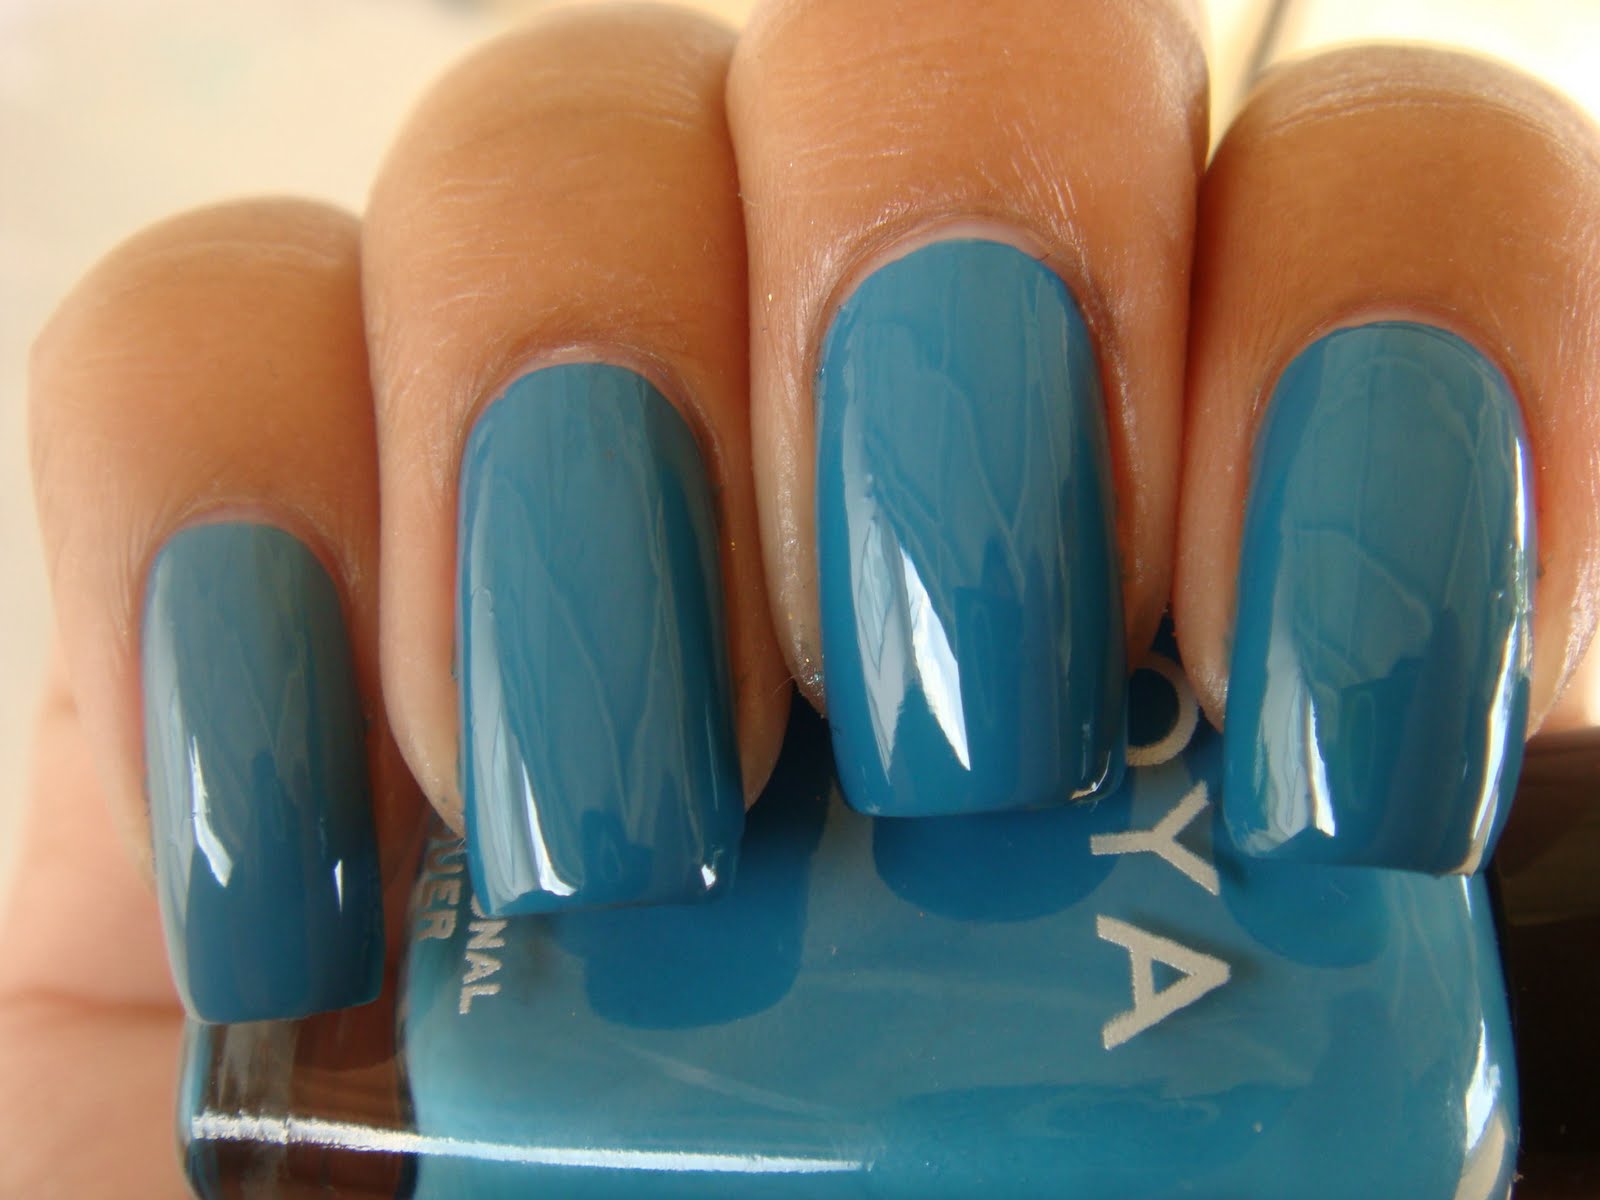
Zoya Breezi 

Kleancolor Cobalt 

Sally Hansen Pacific Blue. Tons of compliments on this one! 

Sally Hansen Blue Me Away! 

Sally Hansen Cosmic Blue. It was so difficult for me to get an accurate pic of this amazing polish because in real life it is not as grainy as it seems here.

Throwing Water into the Ocean by Lynnderella over Orly Royal Navy.

 So that's it for today's post! Let's go Cowboys!! Score is 17-7 Cowboys at the moment. Tomorrow I will be posting my Sunday football half moon mani. Stay tuned!

Wednesday, July 13, 2011

Black Shimmer Nail Polishes - Swatches/ Comparisons

 Today I have a swatch/ comparison for you. Somehow, (I have no idea how O_O) I have accumulated four black polishes with microglitter in the mix. When I was doing my nail polish inventory, a few weeks ago, I noticed that they were almost identical. The only thing was that I was doing my inventory in low lighting, so I couldn't be certain.

 This weekend I finally decided to swatch them to see how different and/ or alike they were. I did two coats of each nail polish and I only took sun pictures because the lighting in the shade didn't show any of the glitter.


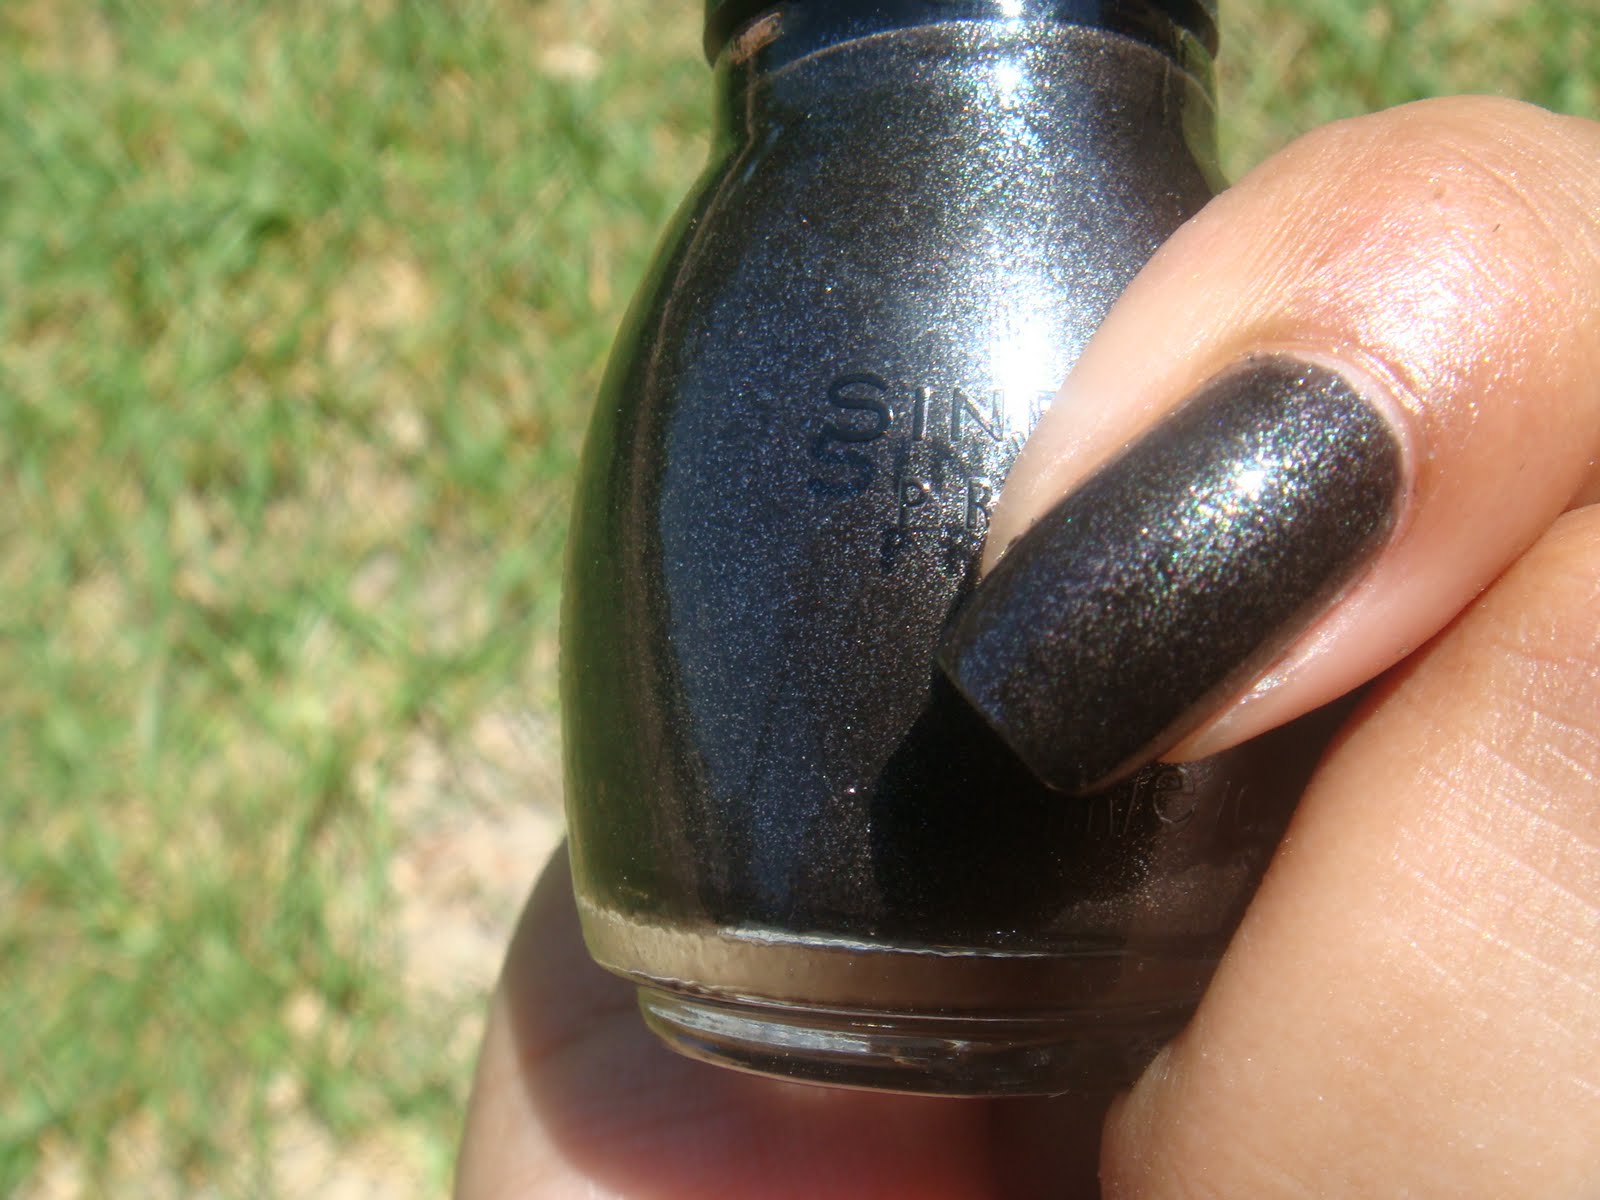
This is Sinful Colors Secret Admirer. If you're looking for a black polish with noticeable silver glitter, then this is the polish for you. This was the only one that you could really tell there was glitter in there and it almost gives it a duochrome look.

This is Little Black Dress. The L.A. Colors one and this one were the only two that came close to what I envisioned black with microglitter polish to be. They are both black bases and both have microglitter, but it's less pronounced and gives it a more subtle look than Secret Admirer.

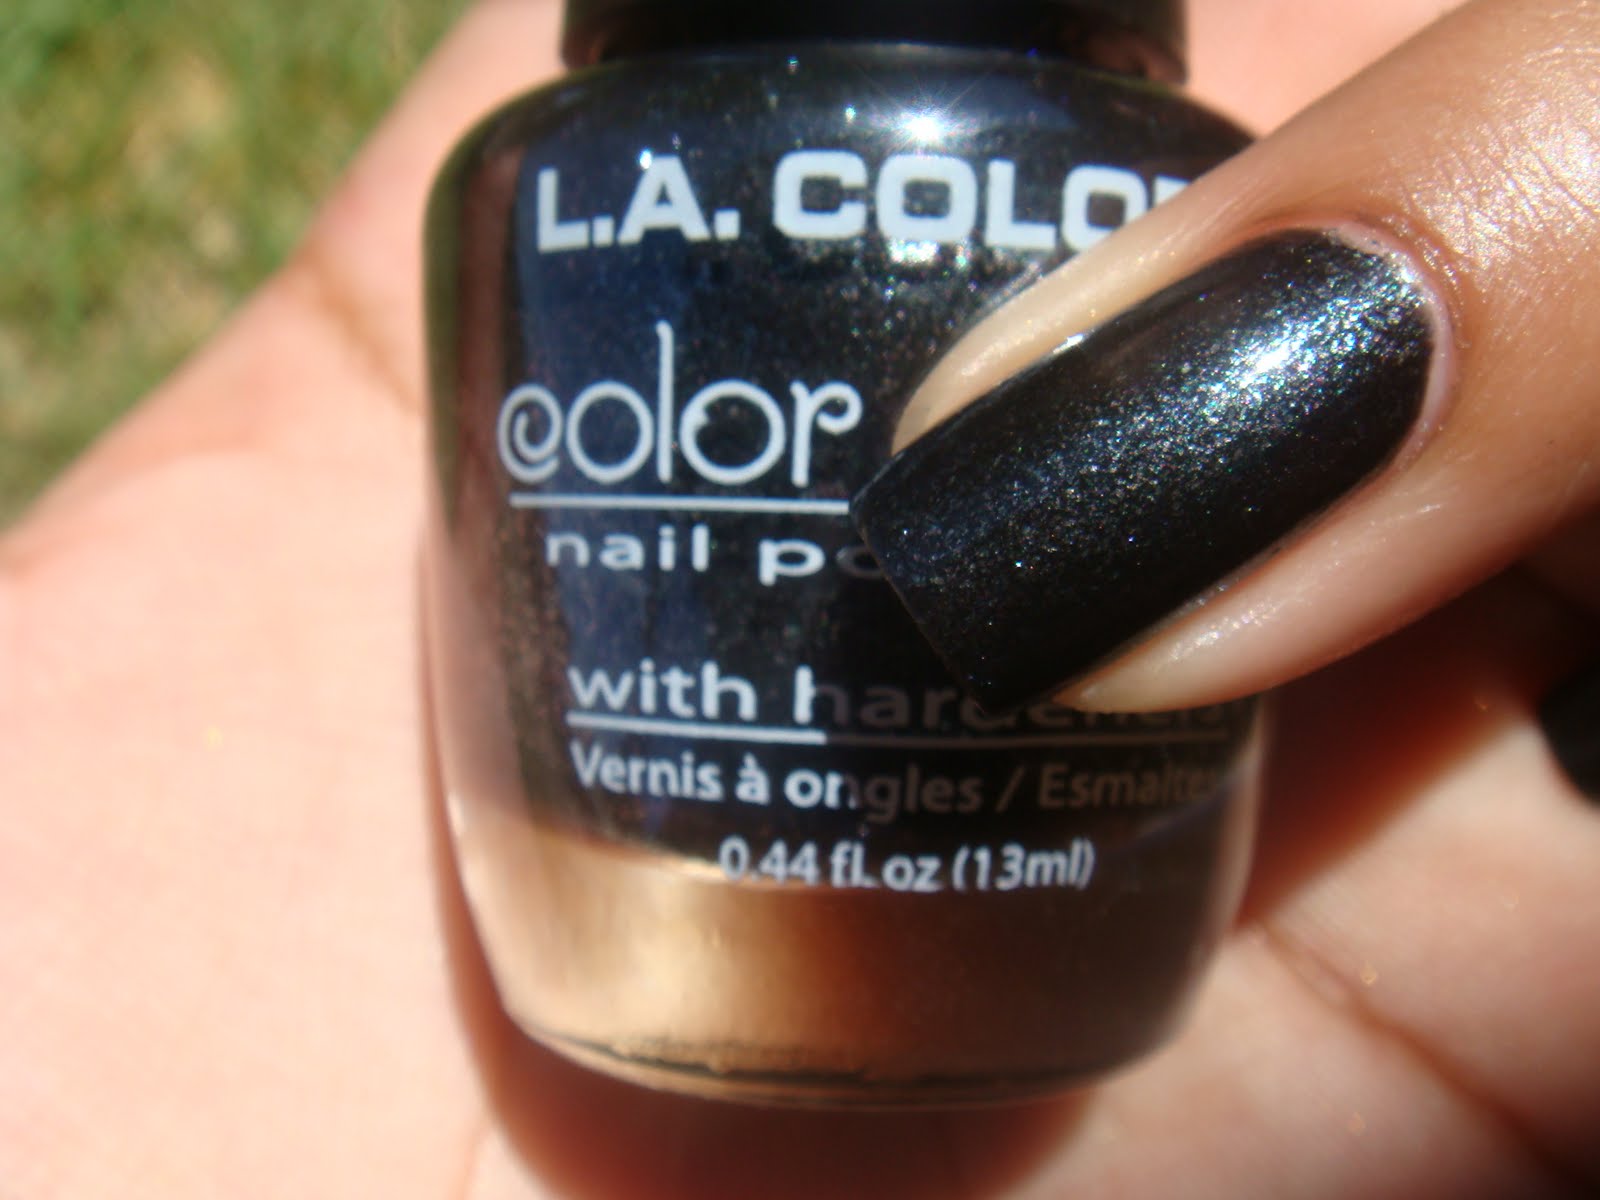
Here is L.A. Colors. Unfortunately, it didn't have a name. I bought this one in a set of six other polishes. The packaging said it was the Shimmer Brights Collection, yet I couldn't find any names for them online. This one and Little Black Dress are pretty close dupes.

The last one is Essence Fabuless. This polish is definitely way more subdued than all of them. It's basically a black creme with a sparse sprinkling of microglitter

 I'm sorry that I didn't provide full swatches of these, but my original plan was to take a closeup of them all together, so that you could distinguish the difference better. However, that was a total fail. When I took pictures like that, you could barely even tell them apart, except for Secret Admirer.

Friday, June 24, 2011

A Glitter Party on Snow

  A lot of nail polish bloggers that I follow on Twitter, seem to have untried boxes of all the new polishes that they plan on swatching. At first, I didn't see a need for it, since one of the things that I love to do after buying polishes is getting to put them away. That just gives me an excuse to spend more time in my polish "room". Well, this week I decided to start an untried box because my husband is getting on to me about buying new nail polishes. He keeps telling me that I should use the ones I already have everytime I buy more. Men. They don't understand. So, in order to keep him happy I am going to start using all the NEW polishes I buy, I'm definitely not going to fish out all the untried ones that are already stored.

 For today's manicure, I used two coats of Sinful Colors Snow Me White. So far, this is my favorite white nail polish yet, since I only had to apply two coats. Then, I applied one coat of Sinful Colors Queen of Beauty, which is the first picture, but then I felt like it needed more bling...


... so I added another glitter topcoat. I used one coat of Wet n' Wilds Kaleidoscope.

I liked it much better with this topcoat because Kaleidoscope has holographic glitter in it, and it looks so good in the sun.

Here's a closeup of all the glitter going on.

 Looking at the closeup makes me want Deborah Lippmann's Happy Birthday even more. I guess now I'll have an excuse to buy more polishes, since I used two out the eight I had in my untried box. I seriously want some of Cult Nails polishes too, but I have to find a way to convince my husband of letting me put an order on 70-80 dollars worth of nail polish. Like that will happen! I'll just have to resort to hiding money from him to feed my addiction. ^_^ Hope you enjoyed today's manicure!

Friday, June 17, 2011

Friday's Nail Art: Modern Dots

   For my final design of nail art week, I decided to take a cue from Sinful Colors. A few months ago, they had a display with a how to on doing designs using a toothpick to create dots. The instructions weren't actually detailed except for telling you that dots can be created using a toothpick, and it pretty much advised you to use your imagination. Sinful Colors is a drugstore brand that is priced at 1.99 at most drugstores, but there's a Walgreens in one of the cities close to me that always has them on sale, two for three dollars. That's where I mainly obtained the few colors that I had, and one day I stopped in looking for a back up to Ocean Green, and saw that they had a HUGE sale on Sinful Colors pricing them at only .50 each. I picked up all the available colors and now my Sinful Colors collection ranges at about 30 in all.

   Perhaps, it was that I bought them at such a low price, but they don't ever seem to inspire me and most of them have remained untried, except for a lucky few. I've been trying to buy OPI's San-tan-tonio and still haven't been able to get ahold of it, so I decided to try out Sinful Colors Nirvana to calm my craving. After polishing my nails, even though I loved the color on it's own, it just made me want to add some color to it. Thinking back to the display I had spotted a few months earlier, I thought it would be a good idea to only utilize Sinful Colors polishes to create some modern dots.

   All colors are from Sinful Colors and those colors are, from left to right, Why Not, Hazard, Innocent, Pull Over and Nirvana.


   I used two coats of Nirvana. Even though this is not an expensive brand, the color payoff and application on all the ones I have tried so far is pretty good. It's not greatest brush, but it's close to it.


   In order to make the process easier, I grabbed a nail polish wheel and placed a bit of polish from all four colors on it. I had to do this for every nail. When I finished, the entire clear plastic was filled with dots of nail polish.

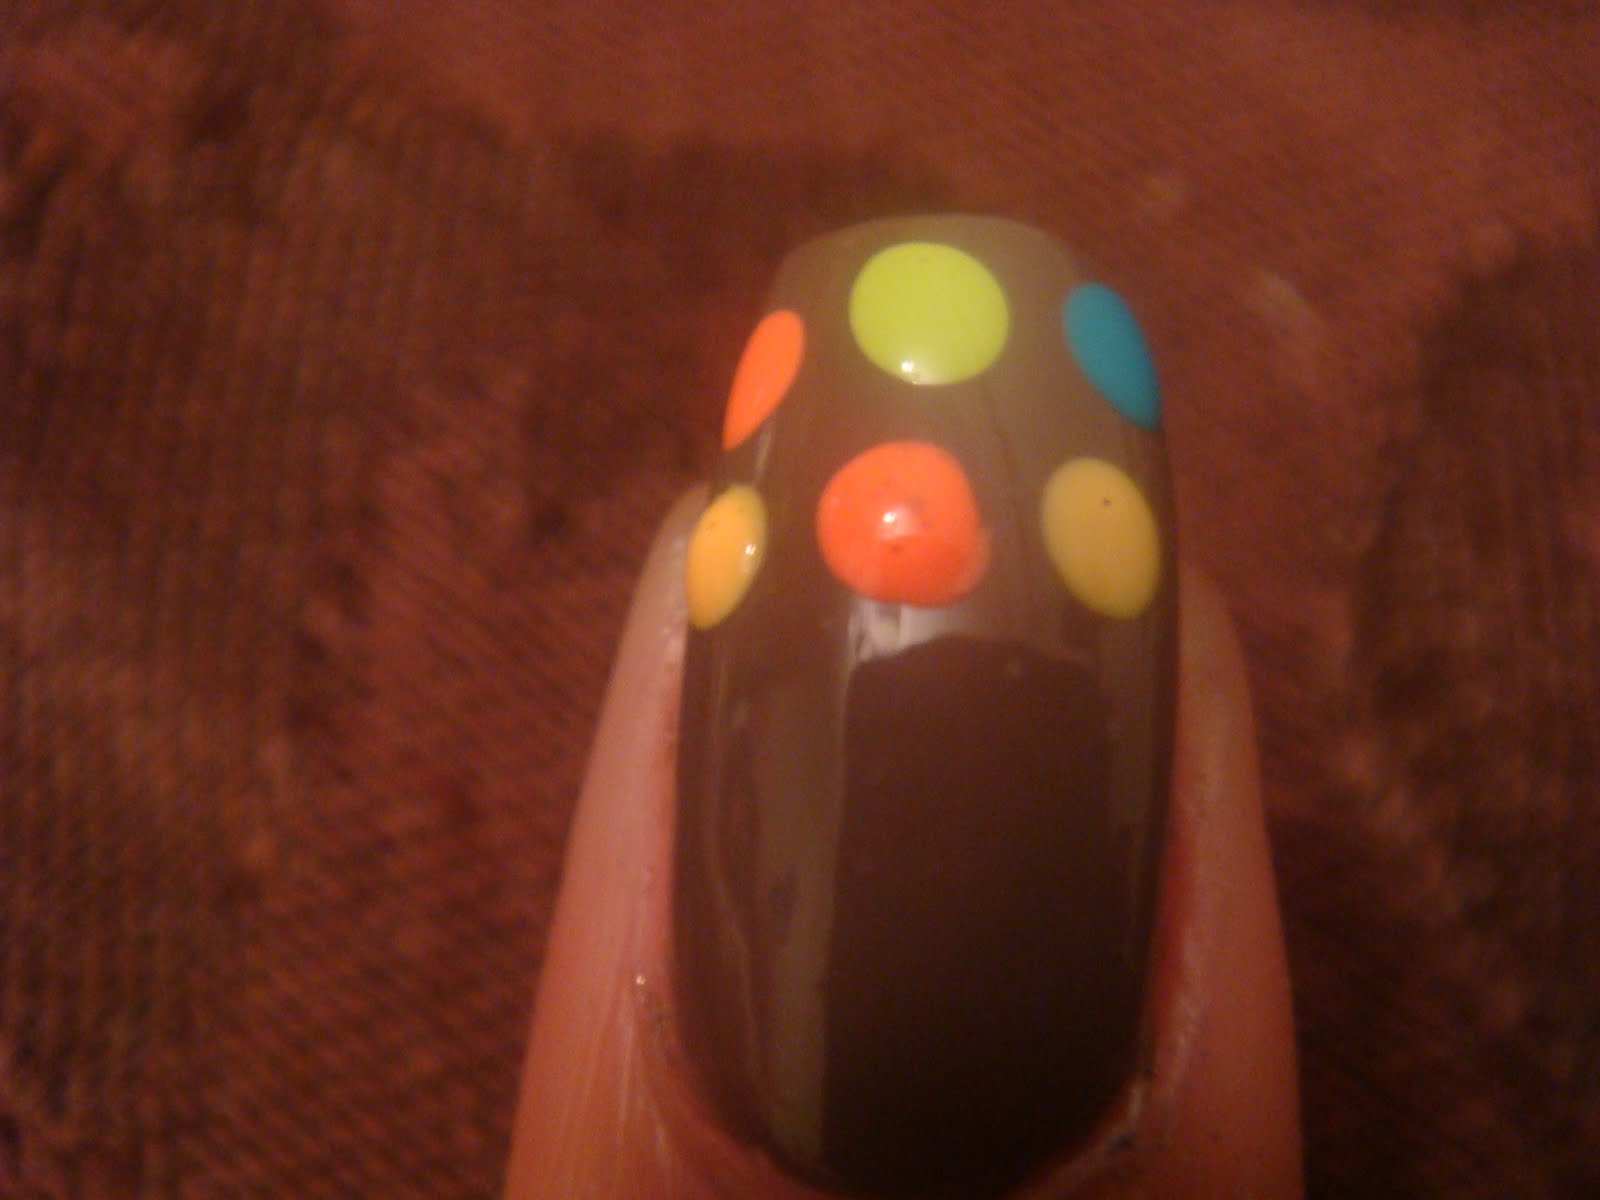
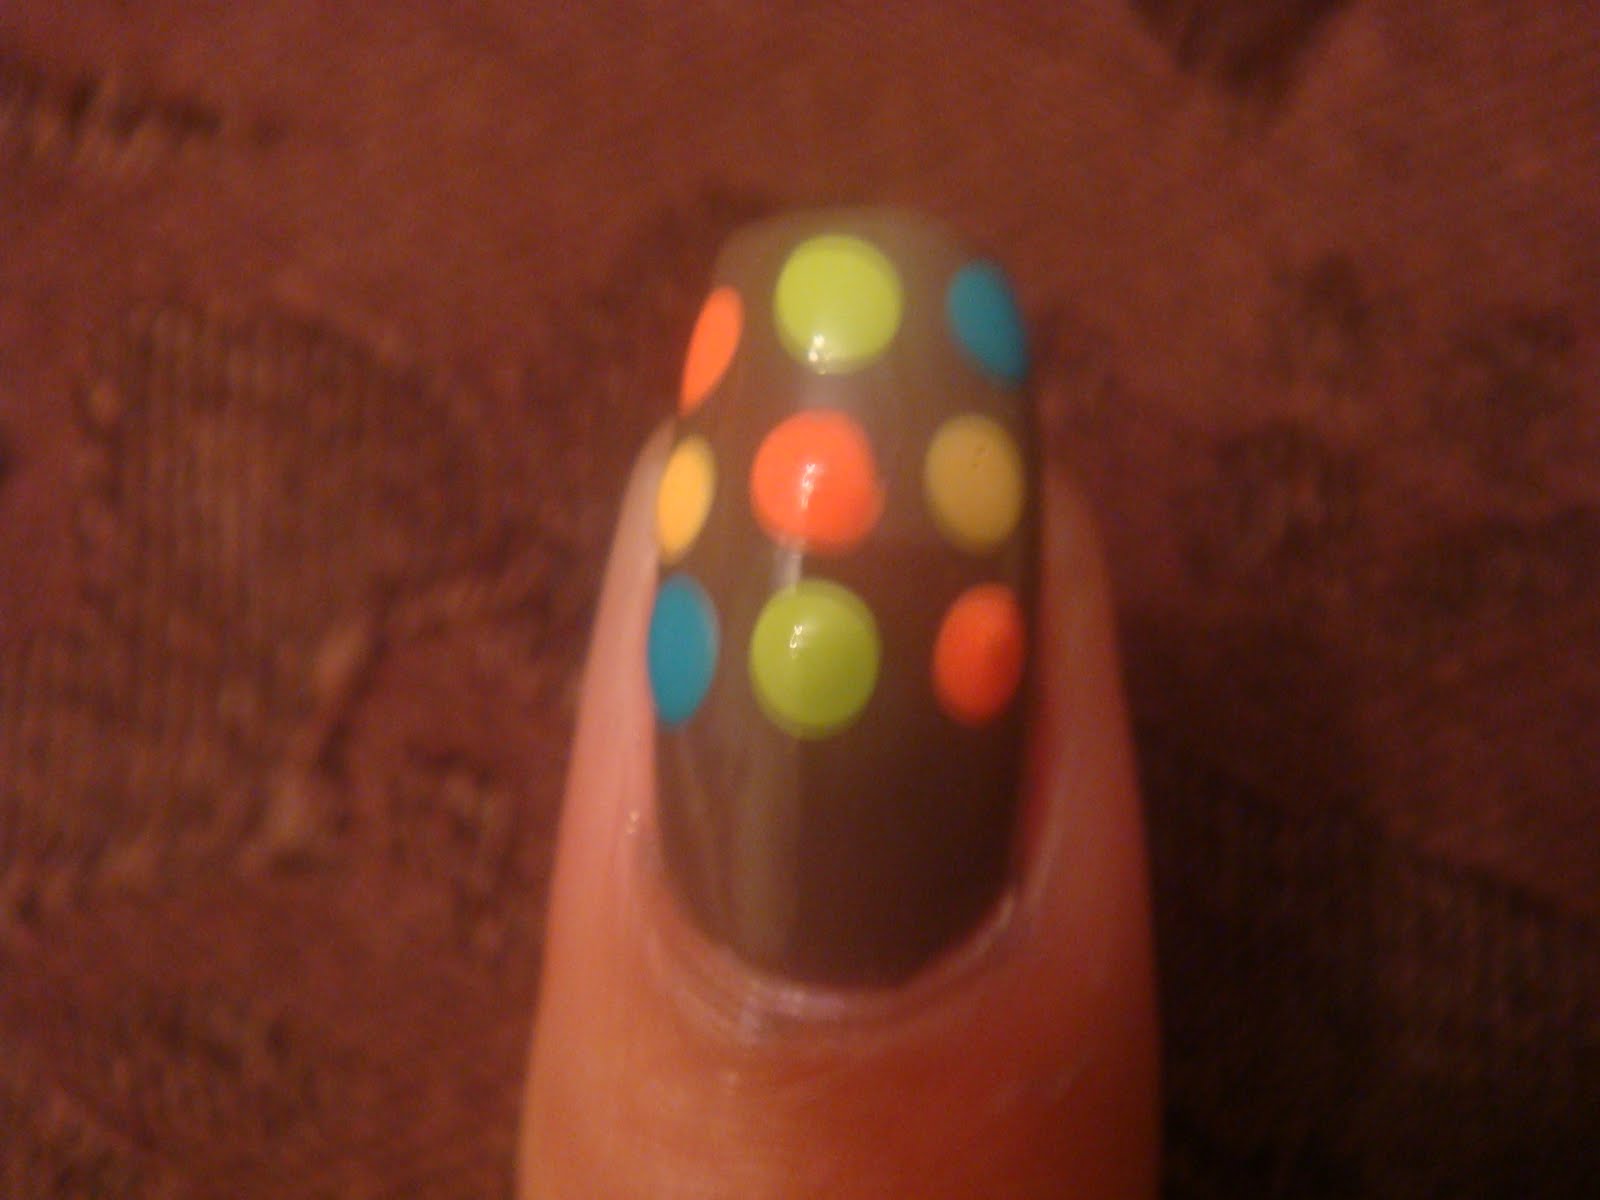
   Every nail had three dots going horizontally and four dots going vertically at the end of the design. There is no particular order in which I picked the colors. I just tried to make it as random as possible. I started with making three dots at the tip of my nail leaving some space in between.
 

   I then created a second line of dots perpendicular to the ones above and kept repeating this until my entire nail was covered.


   This is the finished nail. As you can see, there is no pattern as to what colors I used where, it was all random.


   There is a saying in Spanish which is loosely translated to "one more polka dot and you'll look crazy". That's how I felt with this manicure, so I decided to leave my thumb as an accent nail.


   This is a very busy manicure, which is why, IMO, think that an accent nail is necessary, but feel free to interpret this design as your own. I didn't get to sport this manicure very long because I was suddenly in the mood to attempt water marbling, but that was a big FAIL. That was my third time attempting it and only my second try was ever successful. I think that the reason for my failures have been my nail polish choices and/or the base color or lack thereof. I'm planning on a water marble week as well, but maybe in July, once I get a little more practice in. For this next week, I will just do random nail polish swatches, but look forward to more themed weeks, as I find themed weeks help me strive towards posting more often. Well, that's it for today. Hope you enjoyed!

Wednesday, June 15, 2011

Wednesday's Nail Art: Grape Clusters

    I have always wanted to attempt the Konad manicures, but when it comes down to buying nail polish or Konad plates, polish always wins. The only plate I have is the Hello Kitty one that I bought off Ebay. I'm not sure if it's the polish I have tried with it or the rubber stamp, but my images never come out clear.

   One of the images on the plate is a cluster of grapes. This never appealed to me, until one day I was going through my polishes and saw that I had one of Revlon's scented polishes, Grape Icy. It was a lightbulb moment for me because I immediately thought, what better way to use Grape Icy than to do a grape design?? Now, like I said I'm not good at Konading so I decided to replicate the design with other nail art tools.

   For this design I used Petites Mystical, China Glaze Rainbow, Revlon Grape Icy, Sinful Colors San Francisco, purple striping tape, a dotting tool and a detail nail art brush.


   I decided that the best way to show off my grape clusters would be to use a french manicure design. In order to add some contrast between all the purple I decided on one coat of China Glaze Rainbow over the whole nail as background. I normally do not like sheer nail polish, but this is a nail polish that I would definitely wear on its own. In the bottle it looks white, but in real life it has a pink and purple shimmery cast depending on the angle you look at it.

   For the tips I used 3 coats of Revlon's Grape Icy. This polish is relatively sheer, but for some reason it took ages for it to dry. I suppose the reason for that has to do with the scented formula because the other Revlon scented nail polish that I have also took quite awhile for it to dry. The scent was not overwhelming and did not cause me to get nauseous which happens to me with prolonged exposure to sweet scents. I have heard people describe it as a fake grape smell and they compare it to grape candy. I actually don't like grape candy so to me it was just a sweet smell, but I did let my husband smell it and he immediately identified the smell as grape.


   For the grape clusters, I took my dotting tool dipped in Mystical and created three adjacent dots then two more dots below that and then one last dot below the two dots, like an upside down pyramid.


   My vines were not exactly visible on my actual manicure because like I said before, I'm not great at freehand. Even though they weren't perfect, I don't think that it really matters in this design since the focal point in this design is the grape cluster.

   To better show what my vines were supposed to look like, I went ahead and took a picture of my trial run on a nail art wheel. I used my detail brush dipped in San Francisco and created a sort of cursive e and then drew two leave shapes on either side of the cursive e.


   Afterwards, I took Revlon Grapy Icy and with a smaller dotting tool, I made small dots on random "grapes" to add some dimension.


   I love striping tape. It's one of my favorite nail art products because of the BAM effect it adds to any nail art design. I get compliments everytime I use it. Here, I just cut a strip and lined my french manicure with it, which also helps define my french manicure line and cover any mess ups I might have had.


   Final look with Finger Paints Top Coat:


   I didn't expect to love this manicure as much as I did. I think the color I chose for the background really made the grapes pop and then adding the scented polish made it even more realistic for me. I really enjoyed doing this manicure and I hope you will enjoy it too!

Tuesday, June 14, 2011

Tuesday's Nail Art: Neon Flowers

   I was watching Food Network Challenge on Sunday and the cakes were supposed to be about the 80's time era. Pretty much everyone was using neon colors, since those were popular back in those days and it just made me crave neon on my nails. I have never worn neon colors on their own because I think they're really loud but lately I've been on a neon buying frenzy. I suppose I owe that to all those girls out there strutting around with their neon colors. I love they way they look on other people, but I still haven't tried the solid neon look on my nails. ( I hope my husband doesn't end up reading this, or else he'll be even more upset about my nail polish buying if he finds out I'm buying colors that I don't necessarily wear!)   

   I'm still not ready to do the solid neon but I did come up with this idea to incorporate neon without being too loud. These are the products I used: M.A.C. Vestral White, Orly Va Va Voom, Sinful Colors Irish Green, Sally Hansen Celeb City and Finger Paints Top Coat.


   I started off with M.A.C Vestral White. I have been searching for a good white color and I still haven't been able to find one. This actually took 4 thin layers to prevent the streaking from showing up. I don't like to apply so many layers but it does end up looking really nice if you just work with it. 


   I am going to be doing 4 flowers on each nail, two pink ones and two green ones. I alternated the position of the flowers to make them seem random. To make the flowers you just need to place four dots as if dotting the corners of an imaginary square. I did two fingers at a time because the "lines" on the flowers are formed better if the polish is a bit tacky. Once it's a little tacky, I used a dotting tool to make the "lines". I started from the middle of each dot and dragged the polish towards the center. This will give the flower a more realistic look.


   Here I did the same with Sinful Colors Irish Green.

   After all your flowers are done, using the same dotting tool, I placde silver dots using Celeb City in the middle of the flowers. I chose silver rather than yellow because I wanted to give the design a more blingy look.


   It's not visible in the pictures but once you add the top coat. OMG. It just makes the whole design that much better. The top coat fills in all the "lines" that were created and makes it look really flawless.


   Here is a sun picture. Even though the design is flowers, I feel that it has that summery look because of the neon colors. Hope you enjoyed!