Showing posts with label Sally Hansen. Show all posts

Monday, January 16, 2012

Sally Hansen Pacific Blue w/ Stamping

 I hadn't originally planned to stamp over this polish, but I have become quite addicted to stamping. I actually even ordered some more plates and I'm very excited to get to use those. Pacific Blue is one the most gorgeous blues I have ever seen. It's my favorite blue polish that I own, but I hardly wear it because it stains really, really bad. I always end up with smurf fingers at the time of removal. However, I just recently started wearing CND Stickey as a basecoat and can I just say WOW? CND Stickey is the best basecoat I have tried so far. My nails had no staining whatsoever once I took off my polish. That's right. No smurf fingers!

I used two coats of Pacific Blue and stamped with Wet n' Wild Black Creme using Red Angel plate RA - 113.


 This is my favorite stamping mani I have done so far, even though it was far from perfect. I was using the stamper wrong by starting in the middle. The way I was doing it is only good for perhaps smaller images. For full images it is best to start on one side then end on the other. For great stamping tips and ideas you should visit http://www.youtube.com/user/soguesswhat11. She really is awesome with the stamper and loved watching her videos even before I owned any plates. ^_^

Tuesday, December 13, 2011

Mommy & Me Nails: Sally Hansen Salon Effects in Prep's Cool

 Sally Hansen Salon Effects can be a bit pricey, but if you use them wisely you can get two uses out of them making it much more cost effective. It would still come out $5 a mani if you buy them at $9.99, but a lot cheaper than if you went to a salon to get designs on your nails. Lol I am totally enabling you guys to go buy them because I love them so much. Especially, the new limited edition designs that they have been coming out with. Prep's Cool is one of five designs that Sally Hansen came out with for this holiday season. 

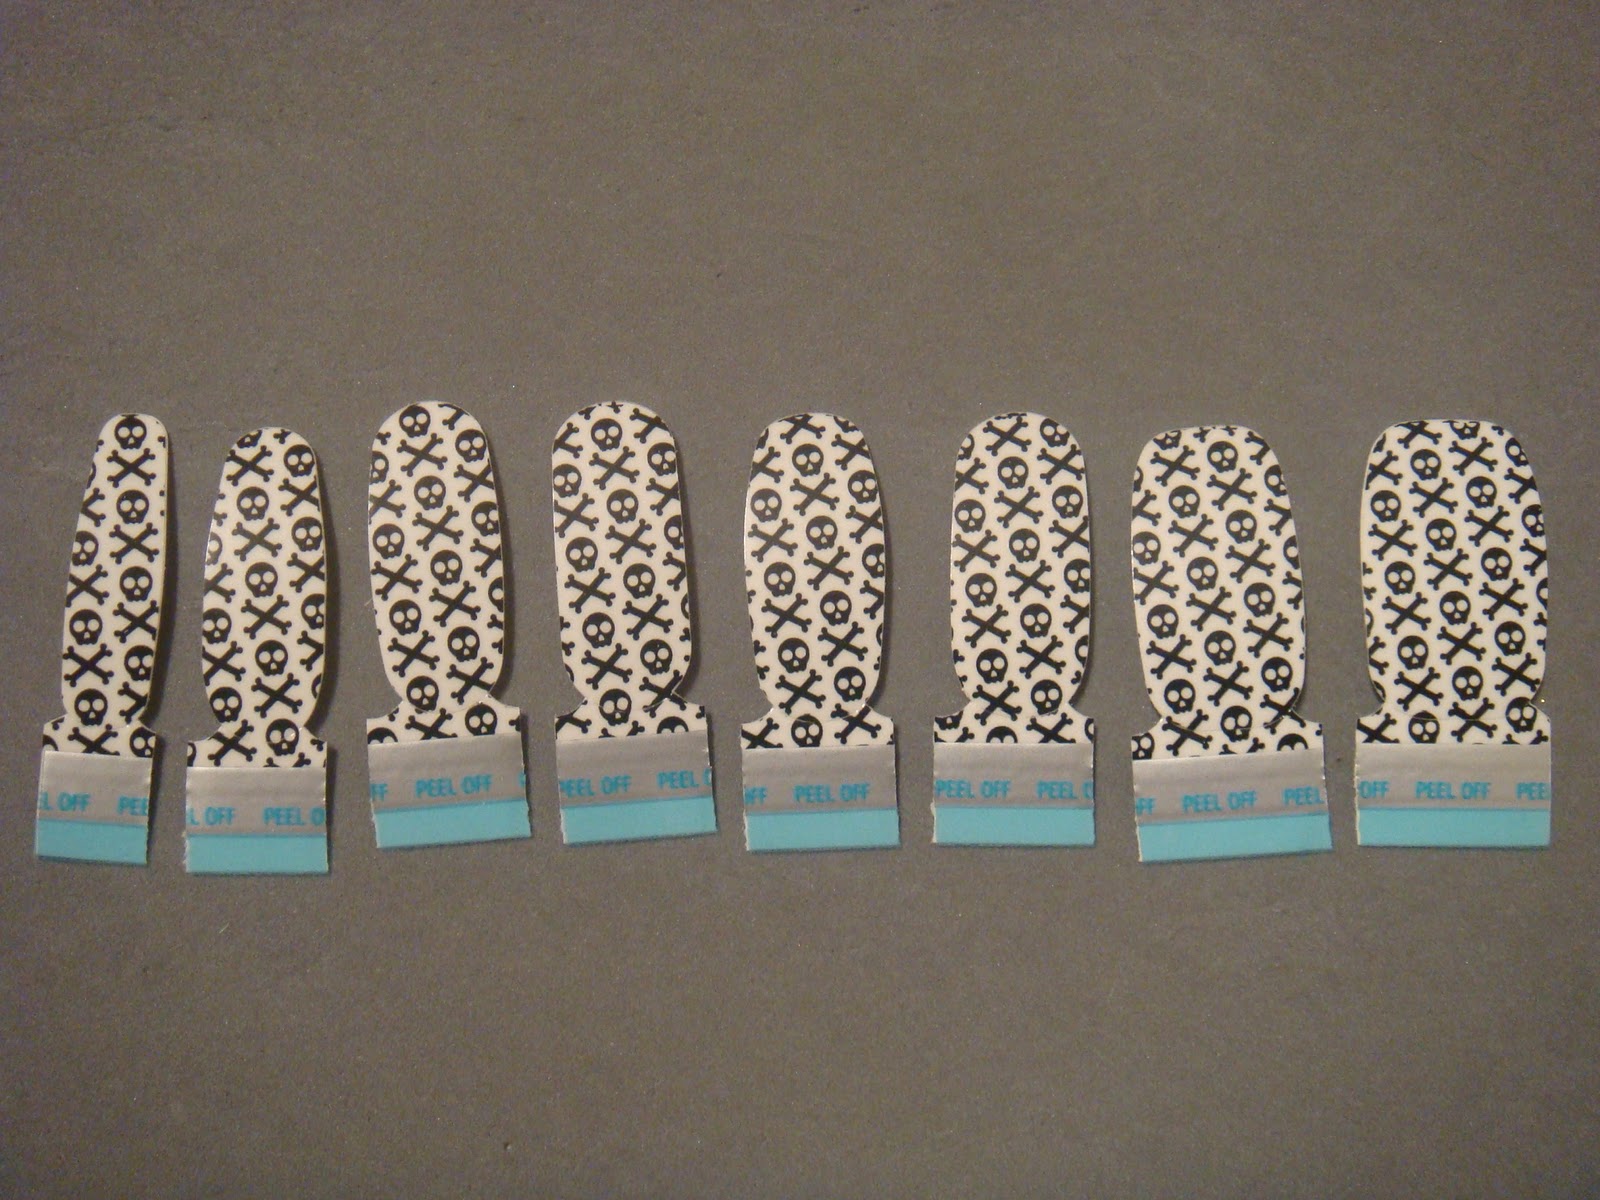
I hadn't planned on doing my daughter's nails when I first started adhering the strips, but when I saw how much I had left over I thought it would be neat to use them on her. I used an extra pinky strip and an extra thumb strip to cut of small pieces to fit her nails. I was able to use only eight strips for all my nails AND my daughter's nails.

I used two coats of Seche Vite to keep them down since they tend to peel at the edges.


No topcoat on my daughter's nails though. She took them off within five minutes after I took the pictures. She loves having her nails done, but can't stand anything on them for too long.

 I loved the way my daughter's nails turned out, even if she only left them on for about ten minutes. I will be doing it again because it's a great way to use all the extra strips that are left over.  ^_^


Wednesday, December 7, 2011

Sally Hansen Gem Crush in Big Money and Lady Luck

 I thought I was going to end up buying all the colors in this collection that Sally Hansen just came out with, but it was a bit of a let down when I actually saw them in stores. It's just that they are sooo similar to China Glaze's Eye Candy polishes that it was difficult to get excited. There were a couple of colors that immediately caught my attention, though. Big Money and Lady Luck seemed to have the most unique colors, so I just picked those two up. Oh, and the price was also a bit steep on these at 6.99 each.

Big Money has small gold glitter with large lavender glitter in a clear base. The combination of colors give this polish a very subtle yet elegant look. I used three coats of Big Money and a coat of top coat for pictures below.


Lady Luck has burgundy glitter and holographic glitter in a clear base. This one was less dense than Big Money and had to use four coats. I loved the colors on this one, but I think it would be best layered.


 I know Sally Hansen has several collections now that are about the same price as salon brands, but in my mind they will always be a drugstore brand. Sometimes I hesitate on purchasing their polishes because of this reason, but I have to admit they do have some great colors. ^_^

Friday, November 11, 2011

Late Halloween Fun

 These are some pictures that I wanted to share with you guys, but I I'll admit I was too lazy to get together since they were in different files. Well, I finally have them all together and thought I would share anyway. It's Friday, so yay, we need some fun to start out our day!

This was a quick mani I did in October. The accent nail is Sally Hansen Xtreme Wear in Sun Kissed and the rest are Sally Hansen Xtreme Wear in Black Out.

This is a haunted gingerbread house that we made as a family, and by family I mean me and my husband. The kids were too busy watching Hocus Pocus for their first time and I'm glad to say they loved it as much as I did when I first saw it! At least they enjoyed eating the leftover candy.

The side of the house, I think my husband did a pretty good job with the spiderweb!

These are my kids. My son went as Bumble Bee and my daughter went as a princess, but this was actually her second costume of the day. She was dressed as Batgirl before this. She actually let me do her makeup and nails! I was pretty excited about that because she has some GREAT eyelashes. Yup, I'm jealous.

Here are her nails. She became pretty frustrated at the end and didn't let me do proper cleanup, but they were ok for one night of fun.

 Sorry, I was late with this post but hope you enjoyed anyways! ^_^

Wednesday, November 2, 2011

Purple Glitter and Flake Sandwich

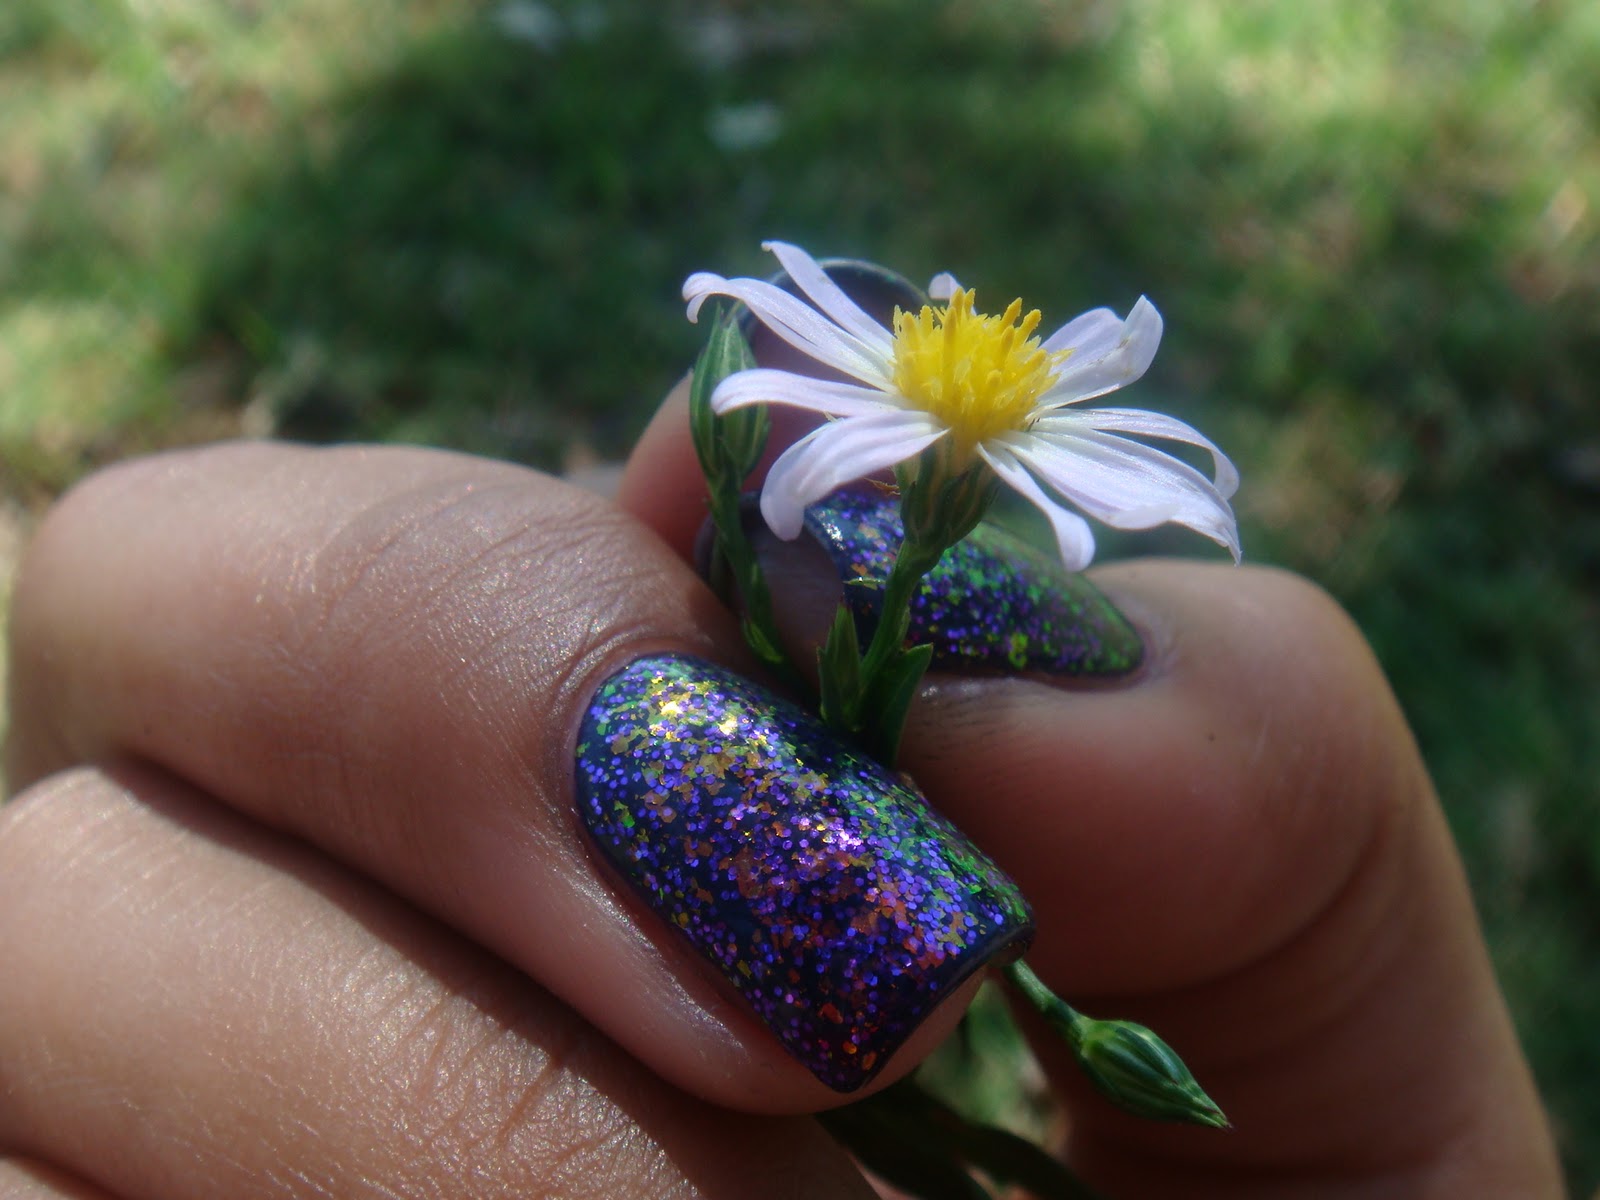
 This is another glitter and flake sandwich I did. I used one coat of Finger Paints Amethyst Atelier, topped with a coat of Ruby Kisses All Purpled Out, a coat of Sally Hansen Hidden Treasure and one last coat of Ruby Kisses All Purpled Out. I had a little too much fun taking pictures of this layering, but enjoy the pictures!


 I don't normally use props, but me and my husband were having an impromptu picnic and when I was holding the flower I saw so many different colors that I just had to take pics. Also, I want to tell you that I loved this mani so much that I kept it on for seven days and the best thing about it was that I had ZERO chips. My husband even told me he was tired of seeing it, so I knew it was time to take it off. ^_^

Thursday, October 27, 2011

A Halloween Dotticure

 I have no idea how I even started doing this mani. All I remember is that I got it into my head to see how many dots it would take to completely cover up a nail. As it turns out, it's really not that many. Well, at least the way I did it. I have a set of dotting tools with five different sizes, so I started making dots from the largest size and filled in any gaps at the end with the smaller size. I used Sally Hansen Xtreme Wear in Deep Purple, Black Out and Sun Kissed. Sally Hansen Xtreme Wear's are my absolute favorite polishes to use when doing nail art because they are very affordable AND have a great formula. 


 I did this on all ten fingers and it took less than 30 minutes and was super easy to do. I was iffy about the design, but my son changed my mind. It was the first thing he noticed when he saw me in the morning and told me they were "COOL". That made my day, since usually when I ask him if he likes my mani he'll say "yea" without even looking. ^_^


Wednesday, October 26, 2011

More apologies are in place for this design. It's a bit messy, but not just because it was a one a.m. design. I am experimenting with acrylic paint and it's a little tricky to get the correct amount of paint and the consistency is a lot smoother than polish. I also think that I need some better art brushes for acrylic paint because my nail art brushes don't seem to play well with the paint or it could be user error. O_o I used Sally Hansen Xtreme Wear in Deep Purple for the background, the grey is Wet Cement, the grass is Going Green and the moon is Mellow Yellow. Only the black is acrylic paint.


 This was my favorite design of the morning, but I was too lazy to do it to the other hand. This literally screams Halloween to me. I don't think I'll be doing it again though, because it is too time consuming and I have over half my stash as untrieds. Maybe next year! ^_^

Tuesday, October 25, 2011

Spooky Water Marbles!!

 Before we get started, I want to point out that all these water marbles were done around one or two a.m. Sunday morning. I didn't plan on doing any water marbles for Halloween, but what can I say? The "artistic" bug bit me, or it could be that I binged on Lindor Truffles and had tons of energy. Either way, my point is that these could have been ten times better. So, I apologize beforehand for all the bubbling and smearing, since I didn't let the polishes dry enough before applying topcoat.

 Ok, so now that we addressed the elephant in the room let's get started! This first one was inspired by pumpkins, hence all the pumpkin stickers. I initially only planned on doing one pumpkin on the index finger, but I got a little carried away. It's a little busy with all the dotting and stickers going on. Though the colors are spot on for Halloween. I used Sally Hansen Xtreme Wear in Sun Kissed and Black Out.

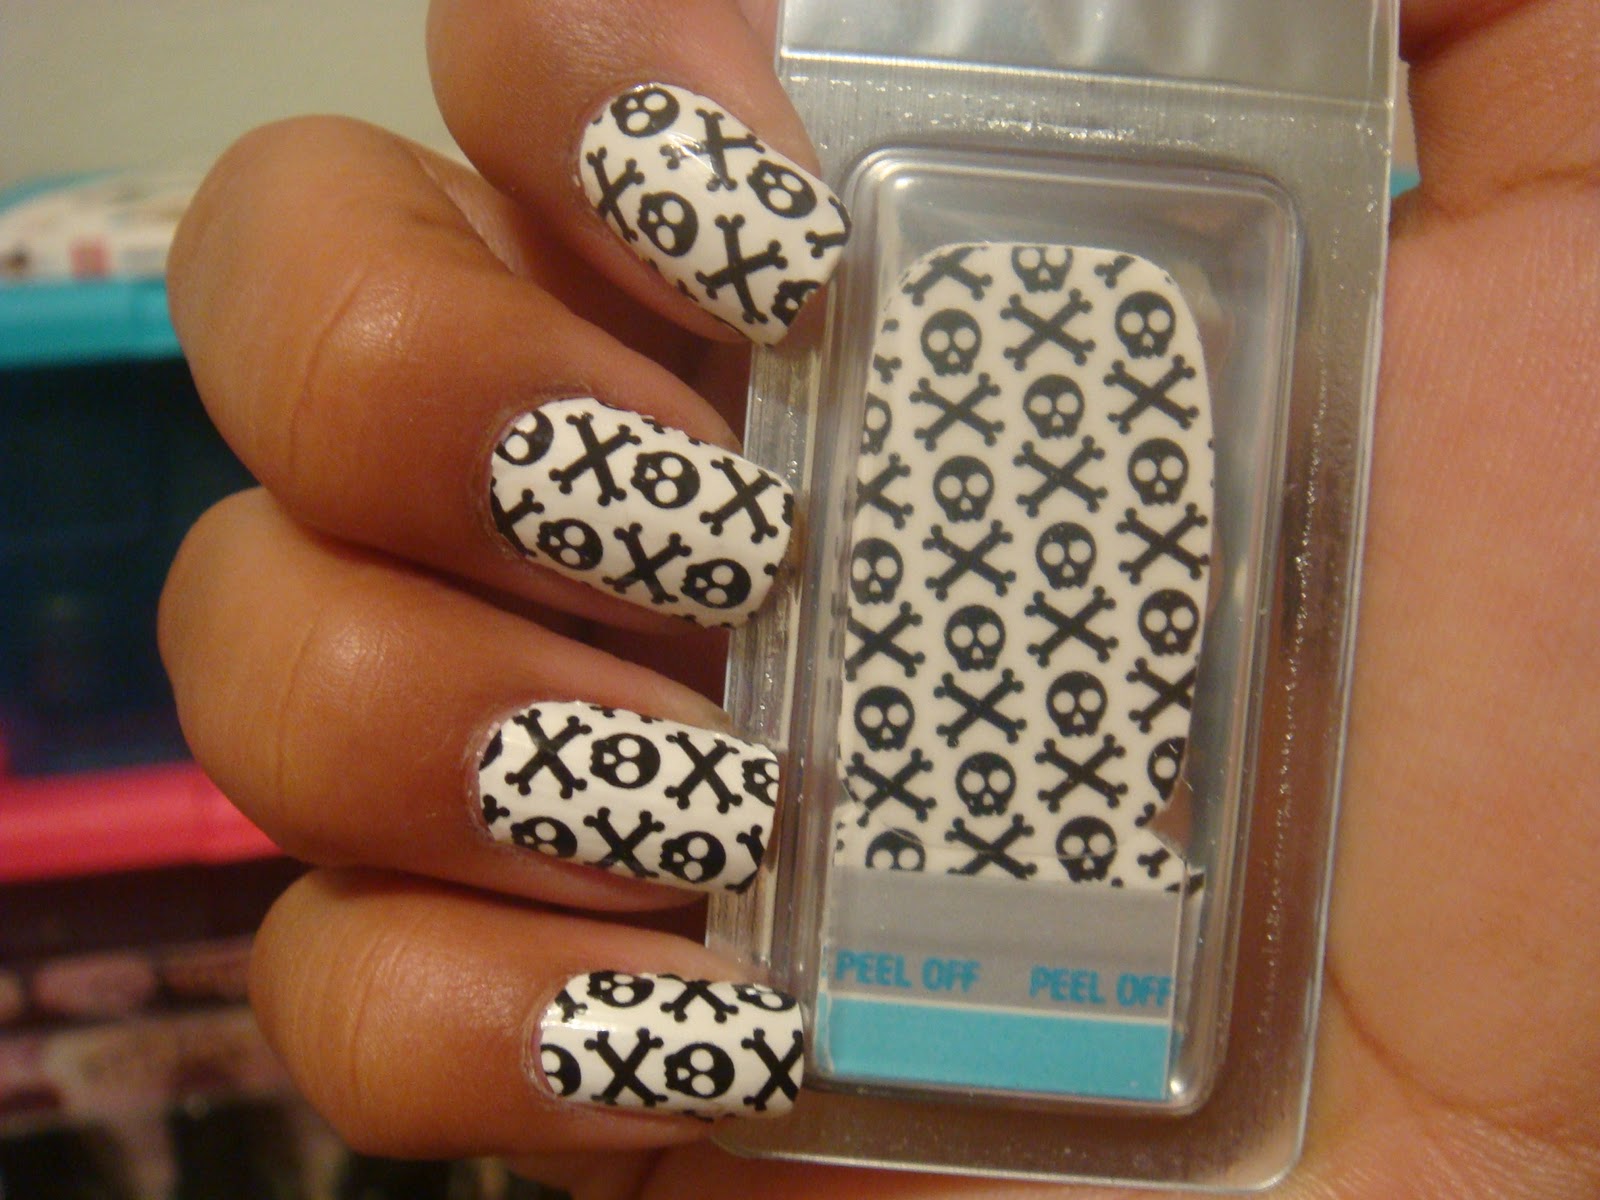
The problem with nail art stickers is that I cannot just place a sticker on my nail and call it a day. I always seem to need to add to it to finish the look. Whenever I just put the sticker on, it looks like it's missing something. That's why I added the dots on the above water marble and I added a second sticker here to balance it out. Skulls have never really been my thing, but they are slowly growing on me. Here I used Sally Hansen Xtreme Wear in Deep Purple, Sun Kissed and Black Out.

I had this idea to do a Frankenstein design ever since the month of October started, yet I could never think of anything else to put on the other fingers. Water marble was the perfect thing to do. I added purple to get a little color in there, since the green and black by themselves looked pretty blah. My index finger is not indicative of a bad cleanup job, rather it was done on purpose to imitate the squarish head of Frankenstein. Yup, the line could have been straighter. Oh, and I added those little bolts to the sides of my nails. I always wanted to have a reason to paint something other than my nail! The colors I used are Sally Hansen Xtreme Wear in Green with Envy, Deep Purple, Black Out and White On.

 I would have gone on doing water marbles all morning long, but then we had a thunderstorm coming through at the time and the light went out for a few minutes. I'm a total scared-y cat. I'm thinking that I want to do the Frankenstein water marble again for Thursday's pot luck, but then I'm also contemplating on using my Connect the Dots. I love that polish so much that I want to wear it all the time and I actually have to hide it from myself to keep me from wearing it 24/7! I have a few more designs I came up with before I did my water marbling, so stay tuned!  ^_^

Saturday, October 22, 2011

Sally Hansen Pumpkin Spice

 Here is the once elusive Pumpkin Spice. I remember when this polish came out and was so hard to find that it even went on eBay for an insane amount of money for just being a Sally Hansen Xtreme Wear. I have to admit that I did think about purchasing it, but I am glad I resisted as I later found this polish at multiple stores in the following weeks. This reminds me of China Glaze Mummy May I? because it almost has that same black jelly base, but with orange glitter instead of purple. The only problem with this polish is that it is best layered over another color as it is extremely sheer! This is five coats, but in Pumpkin Spice's defense the coats were really thin and it didn't end up giving me a thick look.


 I love how squishy it looks and I think this would be a great polish for Thanksgiving. Speaking of holidays, I am still debating on my Halloween mani. I want to do something Halloween-y, but I don't know what yet. I actually will have an opportunity to do two Halloween mani's, since we're having a Halloween potluck next Thursday where I work at. I can't wait because this is when I will also get to find out who is my Boo Buddy! We have been doing Boo Buddies all month long, it's kind of like Secret Santa, except it's for Halloween and every Friday we deliver a gift of $1- $2 and a big gift on the 31st. My Boo Buddy is totally awesome, he/she has given me really great gifts all month long and I am really excited to find out who it is! ^_^

Friday, October 21, 2011

Picture Tutorial: How to get two uses out of one box of Sally Hansen Salon Effects featuring Numbskull

 The only reason why I held off on buying Sally Hansen's Salon Effects was the price. You pay anywhere from 8-10 dollars for a box that will only serve for one use. Why buy one box of some strips when you can get a few drugstore polishes or one salon polish for that price? I actually don't think that I would have ever jumped the gun, had they not came out with the Halloween designs. The cute and unique designs were what drew me to making my first purchase. Even though I am now in love with them, it still stings a bit when I purchase a box because I know I will only get one wear out of them. Or so I thought. In order to get two manicures of one box it is necessary to have short nails as longer nails use up more of the strip and there will not be enough left for your next manicure. I know it sucks for those of you with long nails, but these are also a great pick me up when you have a break and have to file down your nails. Trust me. It happened to me and these strips put me back on the road to happiness after I had to file down my nails. I now plan to have a box or two for those days.


This is what comes in one box of Sally Hansen Salon Effects, plus another package of strips. I show only one because this is all you need for one manicure if you have short nails.


There are eight strips in each package of strips.

In order to get a complete manicure you will need to first choose the strips that best fit your nails and then cut those in half. I don't know about anyone else, but my thumb is pretty huge so I have to use a whole strip. 

Because there is only one side on the strip where you can easily peel off the plastic, I would recommend some tweezers to pull the plastic off the half strips without the easy peel off.

Same thing when peeling off the actual strip from the paper backing. 

Here you see that there is still plenty of strip left over to cover the entire nail. 

When you have a design like Numbskull you can use just one package of strips, but you will have one hand with the design facing outward and...

the other hand with the design facing inward.

 The fact that one hand had the design facing inward and the other hand with the design facing outward didn't bother me one bit. However, you can either alternate the way the design faces finger to finger for a more consistent look, and still use one package of strips. Otherwise, if you are totally OCD you will need to open both packages and use all the strips with the easy peel off side for one mani and the left over half strips for the next mani. This is really up to you and how you feel about it, but you will still get two uses out of each box either way. Lastly, in order to conserve your strips as fresh as possible, make sure you seal them in an air tight fashion so that they will keep pliable and usable. I put the left over strips back in the package they came in and then into a small plastic bag, like the one the file comes in, wrap them really tight with saran wrap and place them back into the plastic box. This is just my way of making the most of my Salon Effects, but if you have other ideas I'd be more than happy to hear them! ^_^

Wednesday, October 19, 2011

Getting abstract with ghosts!

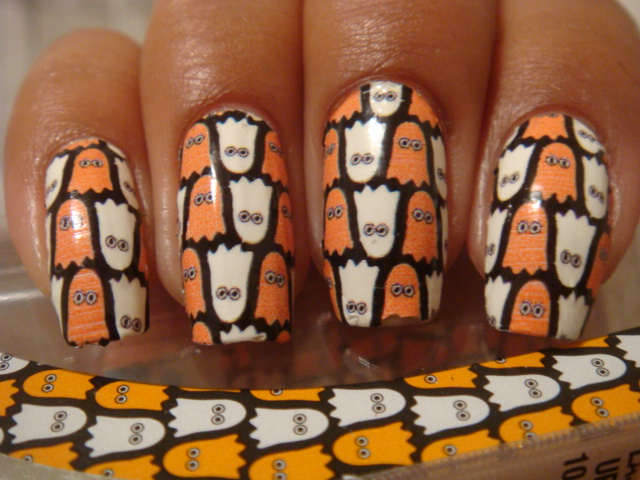
 Another super easy nail art design! Like I said before, easy nail art is my favorite kind of nail art nowadays. I didn't want to spend too much time, so I decided to do an abstract dry water marbling. Dry water marbling is achieved by placing drops of nail polish onto your nail and creating lines or swirls with a dotting tool, toothpick, needle etc. In this instance, I wasn't going for any particular design, I just wanted to achieve an "abstract look". I did the dry water marbling on all my fingers except the index finger. I used a dotting tool to create the eyes and mouth of the ghost with Sally Hansen's Black Out and White On as the background.  The other fingers were done by using Sally Hansen Sunkissed, White On and Black Out as the background.


 This was the first time that I tried the dry water marbling technique and it was a lot cleaner than the wet water marbling. I have seen some really neat designs with dry water marbling, so maybe I'll give it another go. ^_^

Thursday, October 13, 2011

Sally Hansen Salon Effects in Ghoulie Girl

 In my post for Spun for You I mentioned that I wasn't completely sold on the Salon Effects, even though I had a positive experience with those strips. The reason I wasn't completely on board was because of the strips I am about to show you today. This design was the second design I was most excited for during the promo pictures and was happy when I was able to pick these up along with the spiderweb strips. Sadly, I wasn't at all thrilled with them.

 I love how the design looks in pictures and I did receive several compliments, but to me they weren't a home run. I am not knocking on the design or the strips because I think that I might have been partly to blame on that. When I applied the Spun for You strips I had a few minuscule gaps on the sides of my nails with certain fingers, so I decided that this time around I would just use a bigger size to get, what I thought, a better fit. Well, that might not have been the best idea. I found that working with a strip that was slightly bigger than your nail was a lot more difficult to handle than a strip slightly smaller than your nail. I had problems smoothing downthe strip all around the edges of my nails, since the bigger strips were excessive and kept wanting to bunch up. In order to correct this I had to do a lot of stretching, which then affected the design. It wasn't too noticeable, but it didn't make me a happy camper. Plus, I had to do cleanup to remove the excess portions of the strips.

  The overall time it takes to put on the Salon Effects for me has been five to ten minutes from start to finish. I love that. There is no cleanup involved, if done correctly, and you get a great looking design once you're done and the removal process is extremely fast. I have heard of people complaining about the sticky residue that is left on the nail after removal, but I have not had that issue.

 One thing I do want to warn you about, is that you definitely do need a topcoat to prevent chipping on these strips. When I wore Spun for You, I was impressed at the wear of the strips. I used my nails for everything and at the end of five days I ended up taking them off. Not because they were chipped, but because I was ready for a new manicure. They did show a bit of wear on the sides of the tip of my nails, but I think that was because of how I used my nails and the fact that they were quite long. The reason I mention all this is because I thought that I would try to give the strips a go without any topcoat and this is what ended up happening in less than 30 minutes:

My middle finger chipped and some of the strips on the other nails were beginning to lift. I am super grateful to Sally Hansen for including more than just ten strips in the box, which, by the way this box had no missing strips. I wasn't going to walk around with a freshly done manicure and a huge chip on it, so I just used one of the extra strips to replace the chipped one.

Here they are all nicely finished and topcoated with Seche Vite.

 Going along with my top coat warning, I want to add that using Seche Vite alone will cause the lifting I had in my Spun for You manicure and as well cause shrinkage at the cuticle. You can easily fix the lifting by pooling a bit of acetone at the cuticle once Seche Vite has dried and then lightly pat the strip down once most of the acetone has evaporated. You have to wait for the acetone to evaporate to prevent smudging on the design. I didn't notice the shrinkage on the Spun for You design because I placed the strips a bit too close to the cuticle, so when the shrinkage happened it looked perfect. If you want to prevent shrinkage you can use a topcoat under Seche Vite to protect direct contact with the strips. Also, using Sally Hansen's Inst- Dri in the red bottle will not protect the strips. I used this on my left hand and also had some minor chipping before I topcoated it with Seche Vite. I hope to be able to post a picture tutorial on how to apply salon effect strips by next week, with another design, and I will include more tips as well as how to get two uses out of one box of salon effects. ^_^

Monday, October 10, 2011

Sally Hansen Salon Effects in Spun for You

 When I first saw the promo pics for the Sally Hansen Salon Effects for Halloween I was pretty stoked and I was determined to buy them all as soon as they came out. Yea, in a perfect world I would have bought them all at once but the prices of 9.79 at CVS to 8.50 at Wal Mart for one use is a little steep. In fact, I have never before tried them because of the price. You could pretty much buy a bottle of polish that you will get multiple uses out of rather than just one manicure. However, these were special enough, in my opinion, that I decided they were worth the money. The first two I bought were Spun for You and Ghoulie Girl and since have bought Hotwired and Numbskull, but I am still missing Wish Nets.

 I apologize beforehand as this will be a lengthy post, since this is also my review on the nail polish strips. I really had no idea on how to begin to apply, so I did read the instructions. The instructions state to start with clean, dry nails and they include a nail file and orange stick to give yourself a quick manicure. They don't say to apply base coat or top coat. They do, however, stress to be sure your nails have no excess dirt or oils to have your manicure last longer. I have to agree. I applied these after a swatch-a-thon and I was continually moisturizing my cuticles with Qtica cuticle balm, which moisturizes all too well. I swiped my hands with some pure acetone and then applied OPI Chip Skip to dry out my nail beds, BUT I didn't pay much attention to the side walls where the nail meets cuticle and that was a big mistake. The strips didn't want to adhere too well to those areas because of the excessive moisture.

 Peeling the strips from the backing and plastic in which they are encased, was relatively easy and I had no issues there. The issue I had was that on some of the strips I had to flip around to get the better part of the design. That might just be me though. I initially thought that all strips would be the same spider web design, and I was surprised when I saw that every single strip had a different design. To me the design looks best where the spider web is just beginning and I wanted to have that on my nails, not the part of the spider web that was towards the ends.

This is the picture after I finished placing all the strips.

Little tip here. Don't pull too hard on the strips when adjusting them. In fact, this design hardly needed any stretching to conform to my nail. You can see here on my index finger how I had a tear because I was too rough with them. It wasn't noticeable in real life but we all know how macro tends to exaggerate!

Sorry for the lighting here, but I noticed this lifting when I was watching tv and I had my camera with me. The strips don't say to apply top coat, but the sides of the strips didn't want to adhere properly so I added a coat of Seche Vite. That fixed the problem with the sides of my nails, but I had no idea there would be lifting at the cuticle with top coat.

Here's another pic showing how the main ones lifting at the cuticle were my index and ring finger. Now, I had already applied topcoat and didn't want to add another because I had no idea if that would fix it or not. The strips at the end of the cuticles were pretty hardened with the Seche Vite and didn't think another coat of top coat would work, so I improvised.

I used acetone. I used my elf concealer clean up brush and loaded it with a bit of acetone and just let it flow along my cuticle without touching the actual strips. Once, the acetone had mostly evaporated, I used the brush to lightly pat down the strip around the cuticles. That worked great for me and didn't remove any of the polish strips.Yup, macro here is over exaggerating again. The gap is not that huge in real life.

See, the gap at the cuticle is barely noticeable.

Can't even tell I have a gap in this one either!!


 I have only tried two of the design so far, including this one, and I'm not too convinced. Don't get me wrong I LOVED these strips and thought the design was well worth the price, but Ghoulie Girl was a little disappointing for me. Also, the package comes with 16 strips to ensure you get the best possible fit for your nails, but mine only came with 14. Not such a big deal, but I wanted to save them to use as accent nails later. Well, I replied to Sally Hansen on Twitter and they gave me a number to call their customer service. I didn't exactly know what to expect when I called and thought maybe they would just give me a coupon for a few bucks off the price, but they actually offered to send me a new box! This was just this week and I still haven't received them, but if I do get them I will post in in my Hauls and Nail Mail page. Overall, I would advise you to buy the Spun for You design if you are interested in trying them, but I'm not convinced yet on the whole Salon Effects thing. Even if I don't receive the one Sally Hansen is supposed to be sending me, I will be buying this design again. ^_^